

Post by chunk on Nov 30, 2008 11:39:33 GMT -6
Mods, if this needs to be moved, please do so.
This is how I replaced my fork seals. I thought the instructions on the GWK site were a little hard to follow, so perhaps this could lend some clarity.
*This is how I did it. If you know of a better way, by all means do so. Also note that my bike has been stripped down into chop-mode so if your bike is stock, you might have to do things a little differently. Also, do one fork at a time.
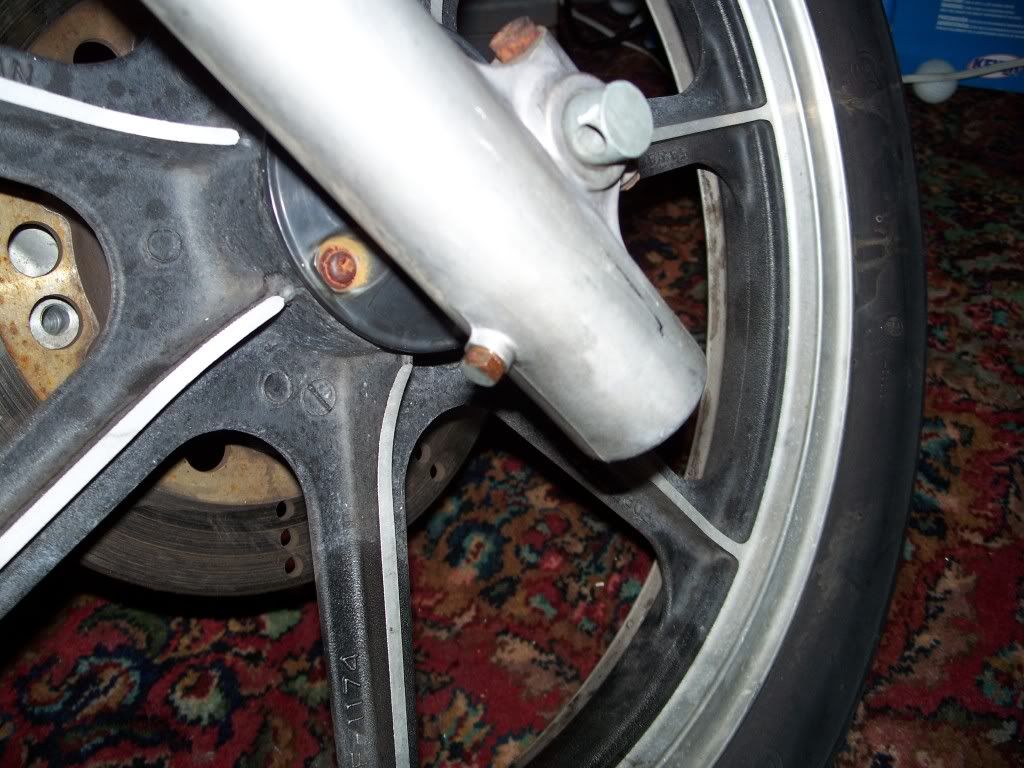
Step 1: Jack up the bike. Either with a jack or the center stand. Don't jack up the bike on the exhaust. Just don't. Remove the front brake caliper. Slide a piece of wood between the caliper and piston to prevent a caliper rebuild just incase someone pulls the brake lever.
*I had to put my bike way up in the air to totally remove the forks from the tree.
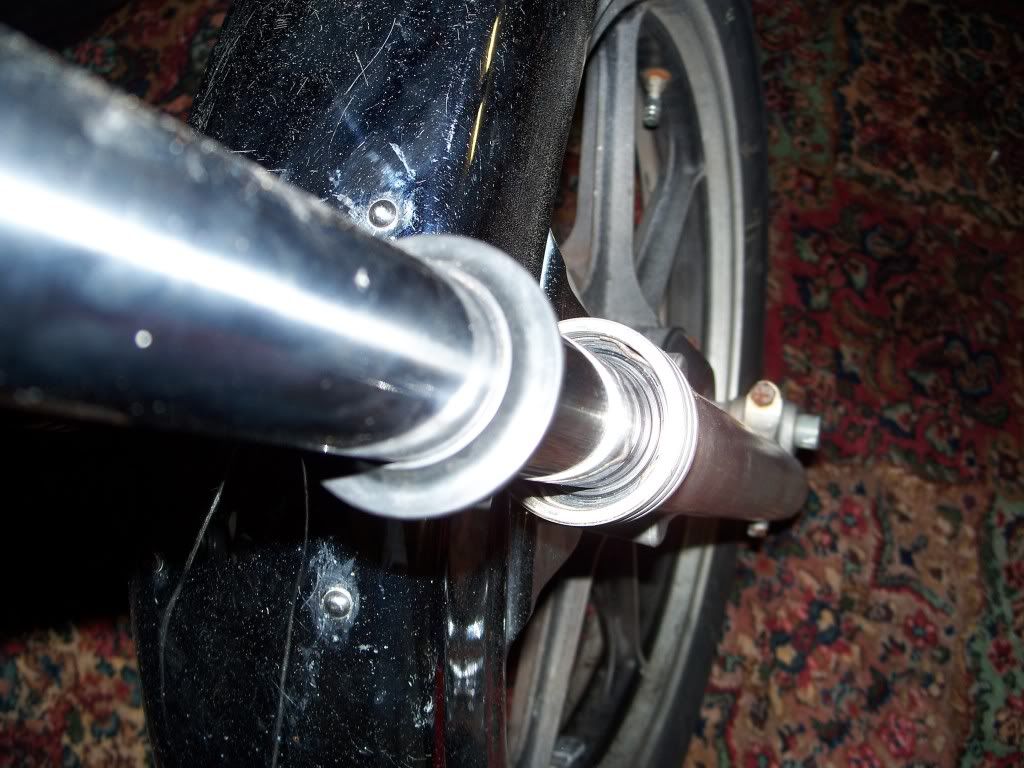
Step 2: Loosen the 4 tree bolts. Pull the forks down and out.
*Its easier to keep the front fender bolted to the forks to keep everything aligned.

Step 3: With the forks standing up, remove the drain plug. The fork oil that comes out is NASTY. Be sure to have a drain pan ready and plenty of shop towels.
The fork has a drain plug. 10mm I believe. When the oil has stopped draining, pump the fork a few times to expel as much oil as possible.
Step 4: After the oil has drained, removed the allen bolt located at the very bottom of the fork. This sucker is tight and can easily strip out. Take your time and remove it with care. The GWK site writeup does a good job of explaining how to fix this if you strip it out.
Step 5: Place the forks in a vise. Please be careful when doing so. You don't want to scratch them up or bend them by having the vise too tight. You need just enough pressure to hold them in place. Also, use wood or rubber, just something soft, on each jaw of the vise to prevent damage to the forks.
Step 6: Remove the plastic cap from the top of the fork and use a small screwdriver to push the air valve down and release any pressure.
Step 7: Use a 12mm deep socket and an extension to push the top of the fork down. With your other hand, use a small screwdriver to pry out the ring.
*This is the worst part of the whole job. It would be nice to have a friend help with this but it can be done by yourself.
Step 8: When you get the ring out, the fork cap comes off. Remove from the vise and start pulling the guts out. Tube, washer, spring, and the thing under the spring. I don't know what to call it. After that, there is a smaller spring.
*Lay out some news paper and lay the parts out in order as they come out. It would not hurt to spray them all down with some parts cleaner to get the old oil off.
Step 9: Remove the dust cover. You can pry it off with a small screwdriver. If they are still in good shape, you can reuse them.
Step 10: Remove the wavy ring located under the dust cover. It is easy to remove.
*Under the wavy ring is the fork seal!!!
Step 11: Hold the tire between your knees and pull the upper fork up. This acts like a slide hammer and will separate the upper fork from the lower fork. You might need to do this a few times.
Step 12: Place the upper fork in order with the rest of the parts.
At the bottom of the lower fork, there is a cone shaped piece of metal followed by a flanged washer, then a spring.
Lay everything out in order and clean everything with parts cleaner.
Step 13: Go back to the upper fork and slide the old fork seal up and off. Slide the new seal on.
Be sure the put it on exactly like the old one came off.
At this point, you will begin to reassemble.
Step 14: Replace the drain plug back into the lower fork.
Step 15: Grab the upper fork and put the guts back in just as they came out. Small spring, the thing I don't know the name of, large spring, washer, tube.
Put some tape around the top of the fork to hold all of the guts in without putting that dreaded top back on the fork.
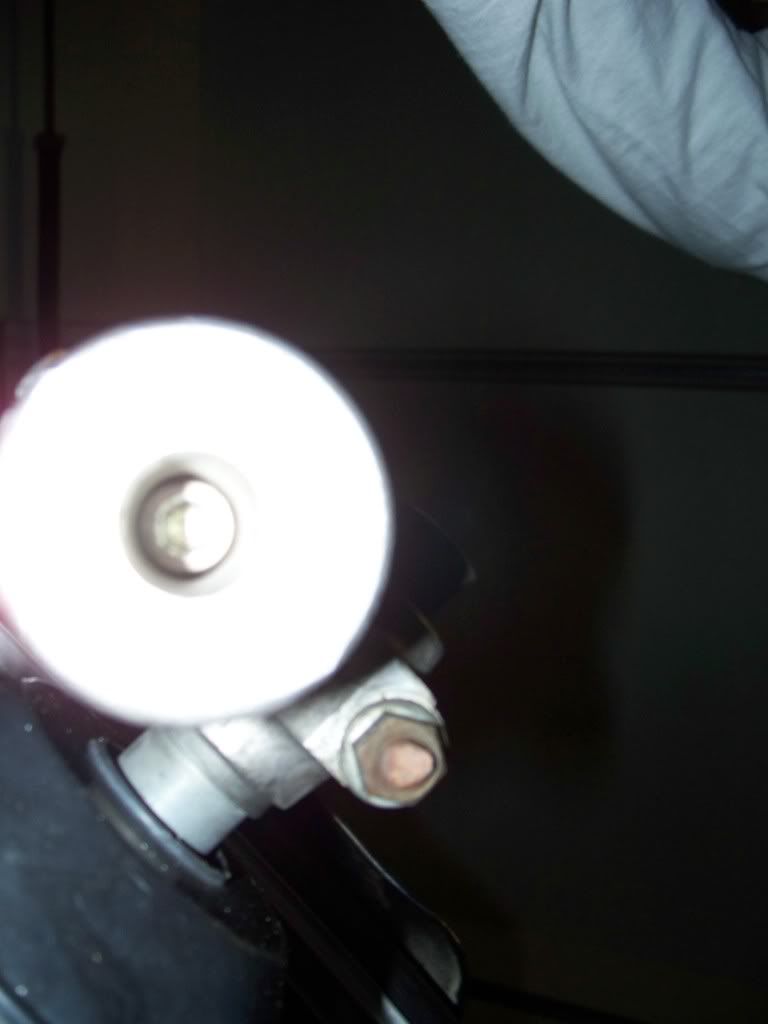
Step 16: Put the cone piece, flanged washer, and spring on the bottom part sticking out of the upper fork. Gently slide it into the lower fork. When the bottom is seated, put the allen bolt back into the very bottom of the fork and snug it up.
This one.
Step 17: This is where my method differs from others.
Take your old fork seal and slide it onto the upper fork so that the old and new fork seals are touching. You will then tap the old seal down with a hammer as a way of pushing the upper and lower forks back together. Do this evenly on all sides.
*Wrap the fork with some paper so you don't scratch the fork with a hammer.
Step 18: Tap the old seal down. Periodically pull the old seal up to see of the new seal has seated all of the way down. When it has, remove the old seal from the upper fork. Now you can reinstall the wavy ring and the dust cover.
Step 19: Make sure the drain plug is tight and the bottom allen bolt is tight.
Step 20: Stand the fork straight up, remove the tape, and add oil. 355cc of fork oil. I used 10 weight. Pump the fork as the fluid is going in to help get the oil down into all of the parts.
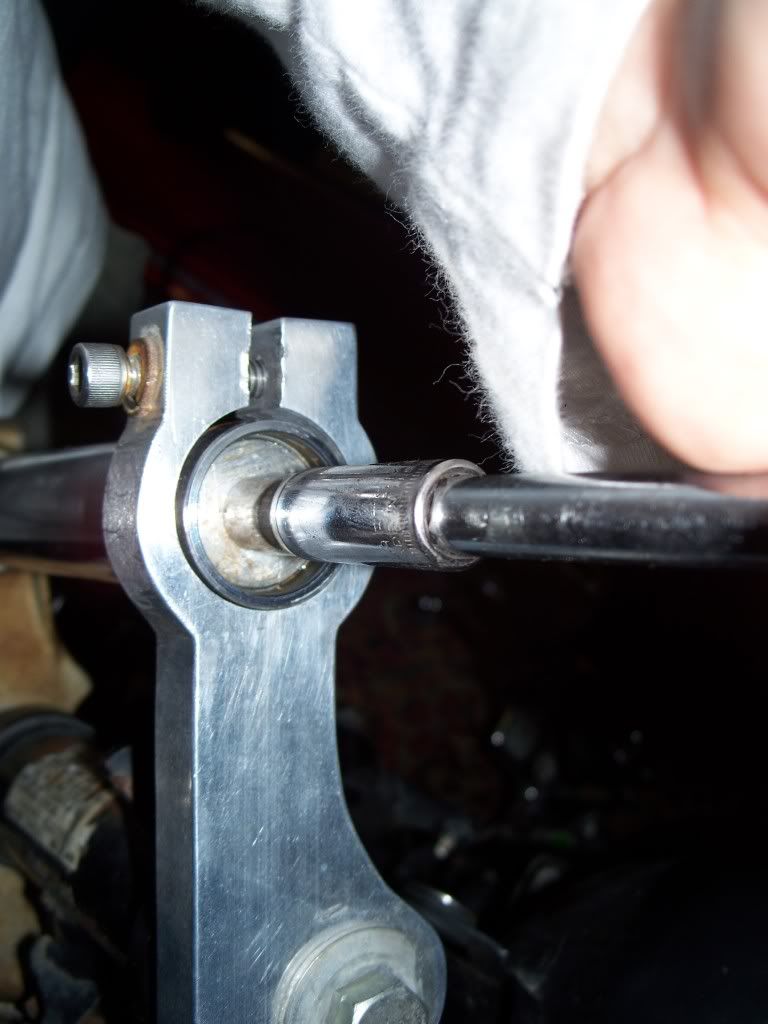
Step 21: Go back to the vise. Don't forget the soft jaws! Place the top cap onto the center of the tube and push down with the deepwell socket/extension. Then replace the ring.
It looks like this.
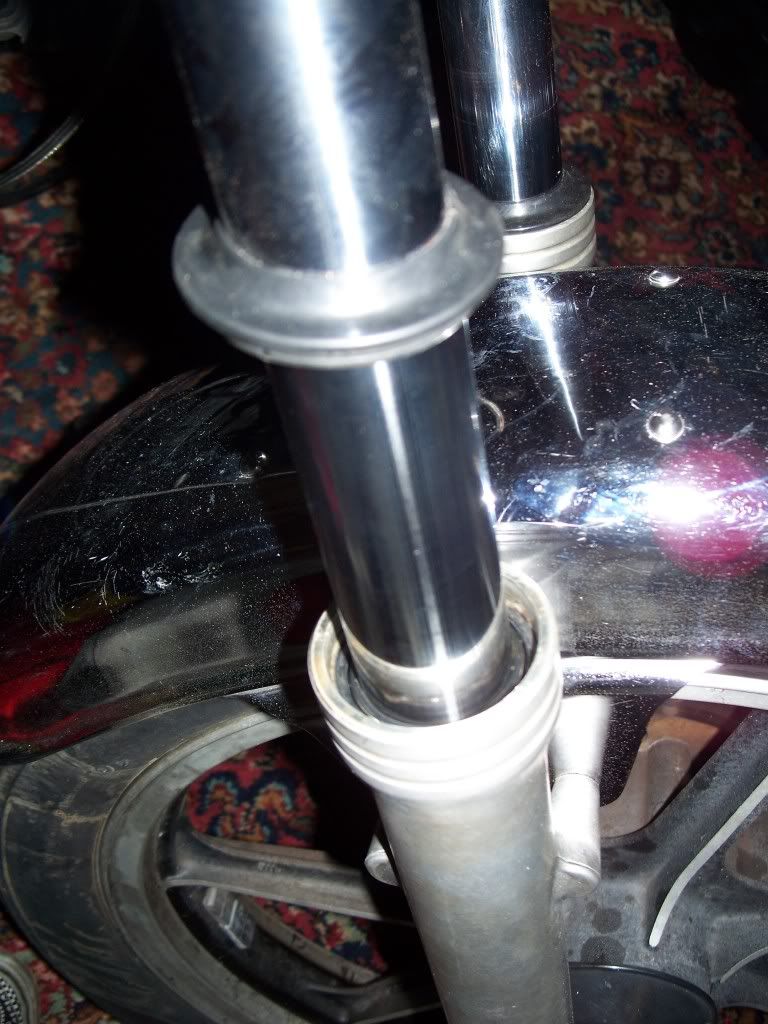
Step 22: Place the forks back up into the trees. Replace the caliper, and tighten all of the bolts.
I would use this writeup and the GWK site writeup to help you through the process.
Be careful and do the job right the first time. If you have any questions, I'll be around.
This is how I replaced my fork seals. I thought the instructions on the GWK site were a little hard to follow, so perhaps this could lend some clarity.
*This is how I did it. If you know of a better way, by all means do so. Also note that my bike has been stripped down into chop-mode so if your bike is stock, you might have to do things a little differently. Also, do one fork at a time.
Step 1: Jack up the bike. Either with a jack or the center stand. Don't jack up the bike on the exhaust. Just don't. Remove the front brake caliper. Slide a piece of wood between the caliper and piston to prevent a caliper rebuild just incase someone pulls the brake lever.
*I had to put my bike way up in the air to totally remove the forks from the tree.
Step 2: Loosen the 4 tree bolts. Pull the forks down and out.
*Its easier to keep the front fender bolted to the forks to keep everything aligned.
Step 3: With the forks standing up, remove the drain plug. The fork oil that comes out is NASTY. Be sure to have a drain pan ready and plenty of shop towels.
The fork has a drain plug. 10mm I believe. When the oil has stopped draining, pump the fork a few times to expel as much oil as possible.
Step 4: After the oil has drained, removed the allen bolt located at the very bottom of the fork. This sucker is tight and can easily strip out. Take your time and remove it with care. The GWK site writeup does a good job of explaining how to fix this if you strip it out.
Step 5: Place the forks in a vise. Please be careful when doing so. You don't want to scratch them up or bend them by having the vise too tight. You need just enough pressure to hold them in place. Also, use wood or rubber, just something soft, on each jaw of the vise to prevent damage to the forks.
Step 6: Remove the plastic cap from the top of the fork and use a small screwdriver to push the air valve down and release any pressure.
Step 7: Use a 12mm deep socket and an extension to push the top of the fork down. With your other hand, use a small screwdriver to pry out the ring.
*This is the worst part of the whole job. It would be nice to have a friend help with this but it can be done by yourself.
Step 8: When you get the ring out, the fork cap comes off. Remove from the vise and start pulling the guts out. Tube, washer, spring, and the thing under the spring. I don't know what to call it. After that, there is a smaller spring.
*Lay out some news paper and lay the parts out in order as they come out. It would not hurt to spray them all down with some parts cleaner to get the old oil off.
Step 9: Remove the dust cover. You can pry it off with a small screwdriver. If they are still in good shape, you can reuse them.
Step 10: Remove the wavy ring located under the dust cover. It is easy to remove.
*Under the wavy ring is the fork seal!!!
Step 11: Hold the tire between your knees and pull the upper fork up. This acts like a slide hammer and will separate the upper fork from the lower fork. You might need to do this a few times.
Step 12: Place the upper fork in order with the rest of the parts.
At the bottom of the lower fork, there is a cone shaped piece of metal followed by a flanged washer, then a spring.
Lay everything out in order and clean everything with parts cleaner.
Step 13: Go back to the upper fork and slide the old fork seal up and off. Slide the new seal on.
Be sure the put it on exactly like the old one came off.
At this point, you will begin to reassemble.
Step 14: Replace the drain plug back into the lower fork.
Step 15: Grab the upper fork and put the guts back in just as they came out. Small spring, the thing I don't know the name of, large spring, washer, tube.
Put some tape around the top of the fork to hold all of the guts in without putting that dreaded top back on the fork.
Step 16: Put the cone piece, flanged washer, and spring on the bottom part sticking out of the upper fork. Gently slide it into the lower fork. When the bottom is seated, put the allen bolt back into the very bottom of the fork and snug it up.
This one.
Step 17: This is where my method differs from others.
Take your old fork seal and slide it onto the upper fork so that the old and new fork seals are touching. You will then tap the old seal down with a hammer as a way of pushing the upper and lower forks back together. Do this evenly on all sides.
*Wrap the fork with some paper so you don't scratch the fork with a hammer.
Step 18: Tap the old seal down. Periodically pull the old seal up to see of the new seal has seated all of the way down. When it has, remove the old seal from the upper fork. Now you can reinstall the wavy ring and the dust cover.
Step 19: Make sure the drain plug is tight and the bottom allen bolt is tight.
Step 20: Stand the fork straight up, remove the tape, and add oil. 355cc of fork oil. I used 10 weight. Pump the fork as the fluid is going in to help get the oil down into all of the parts.
Step 21: Go back to the vise. Don't forget the soft jaws! Place the top cap onto the center of the tube and push down with the deepwell socket/extension. Then replace the ring.
It looks like this.
Step 22: Place the forks back up into the trees. Replace the caliper, and tighten all of the bolts.
I would use this writeup and the GWK site writeup to help you through the process.
Be careful and do the job right the first time. If you have any questions, I'll be around.


 37MM.
37MM.


 This sticky should come in handy thanks for posting it.