|
|
Post by crazycoyote82 on May 3, 2011 0:22:33 GMT -6
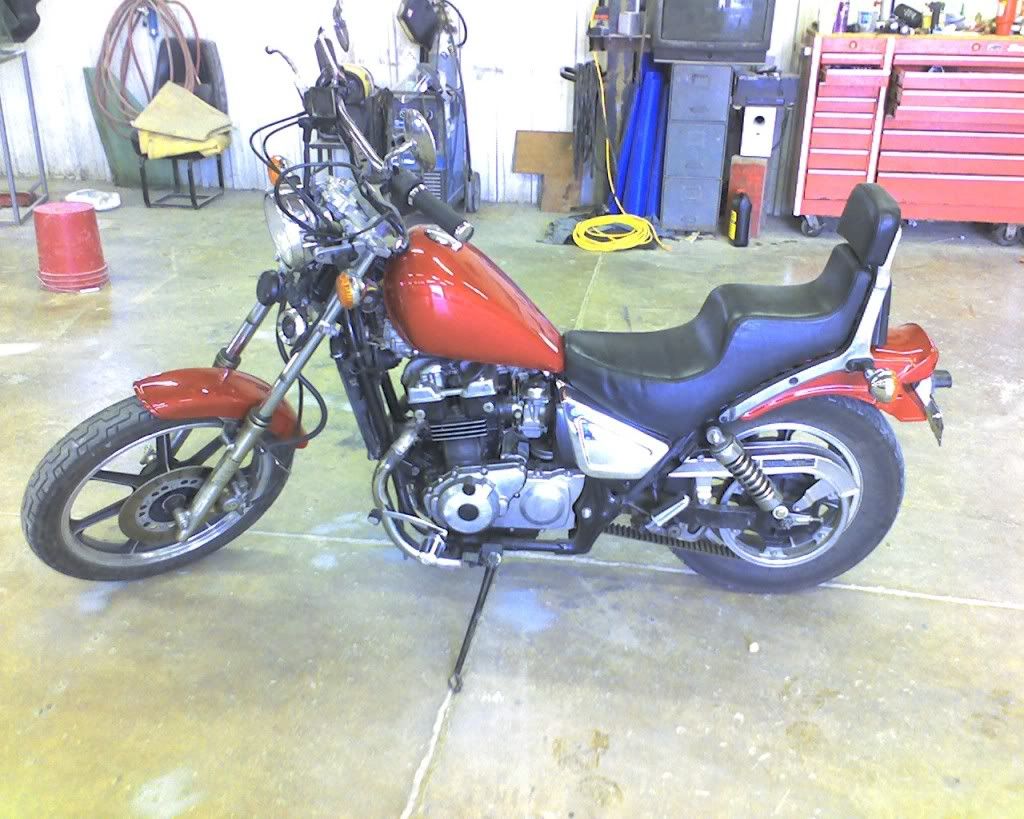
Ill be adding more to this as the project progresses. This is my FIRST bike. So far im loving it. Heres what it looked like day 1 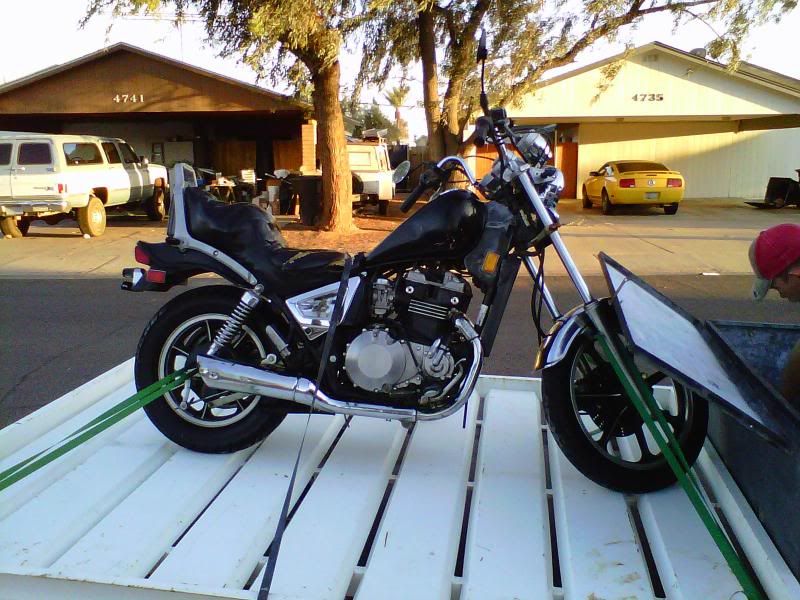  After a brief once over which included gen maintenance I decided to dig into the tank first. I applied paint stripper on to it and got to work. 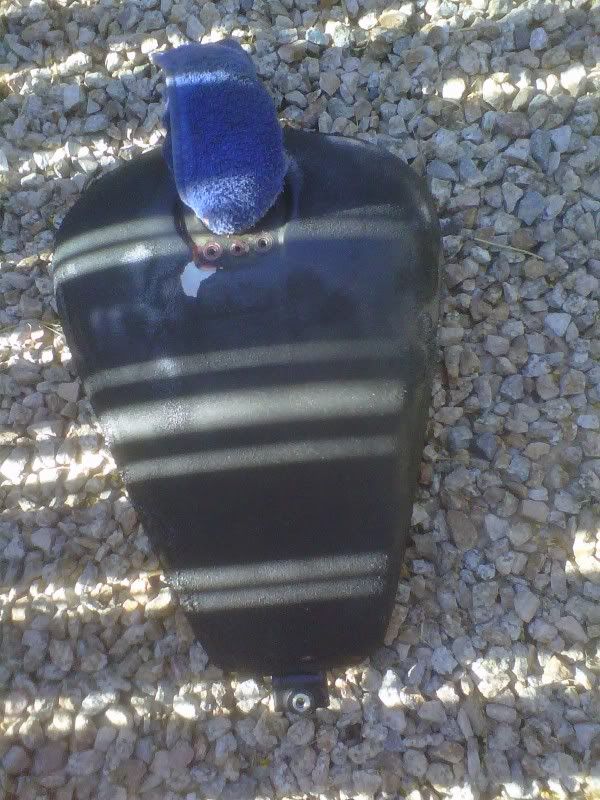 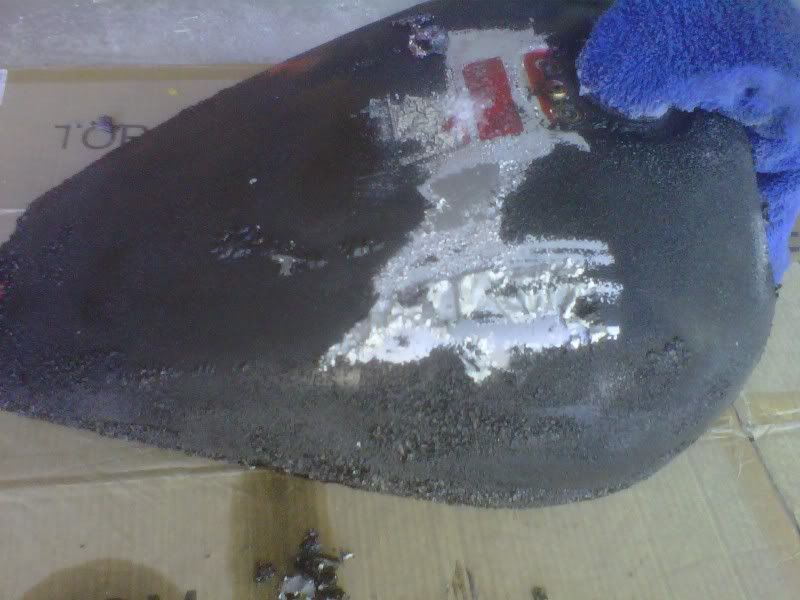 Who knew this was still hiding under all that mess. LOL 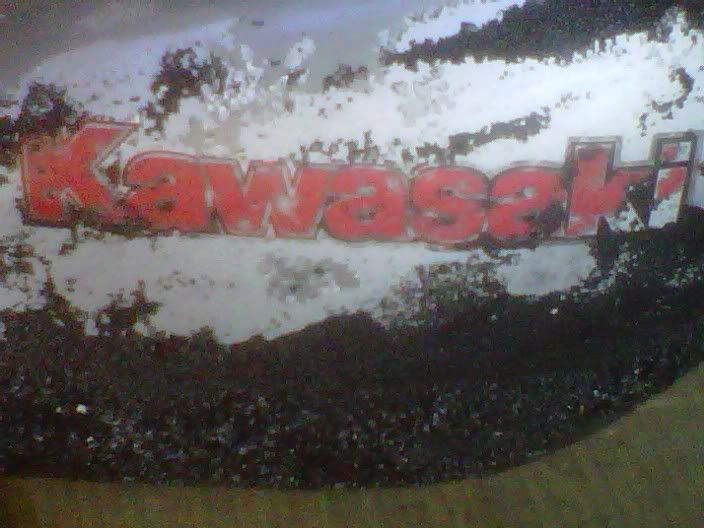 The Paint stripper would not get the factory paint that well so I had to actually start doing some work. 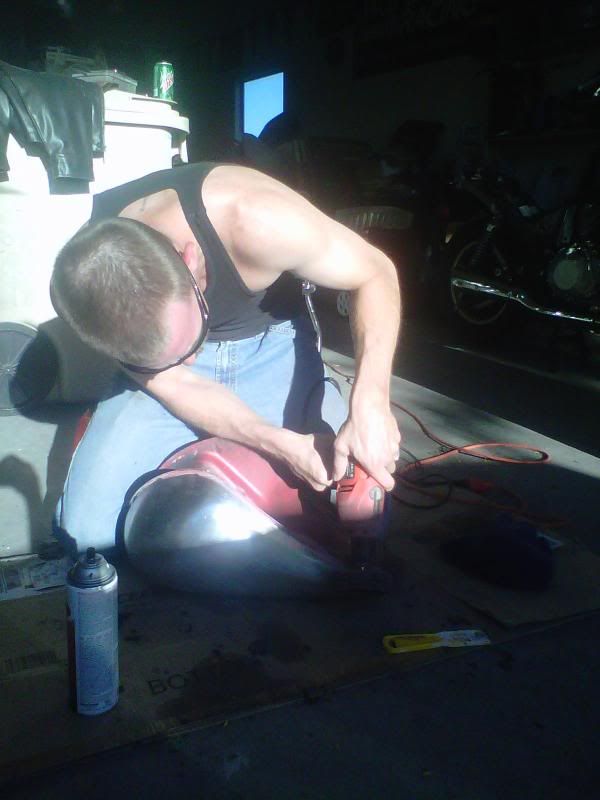 Almost done 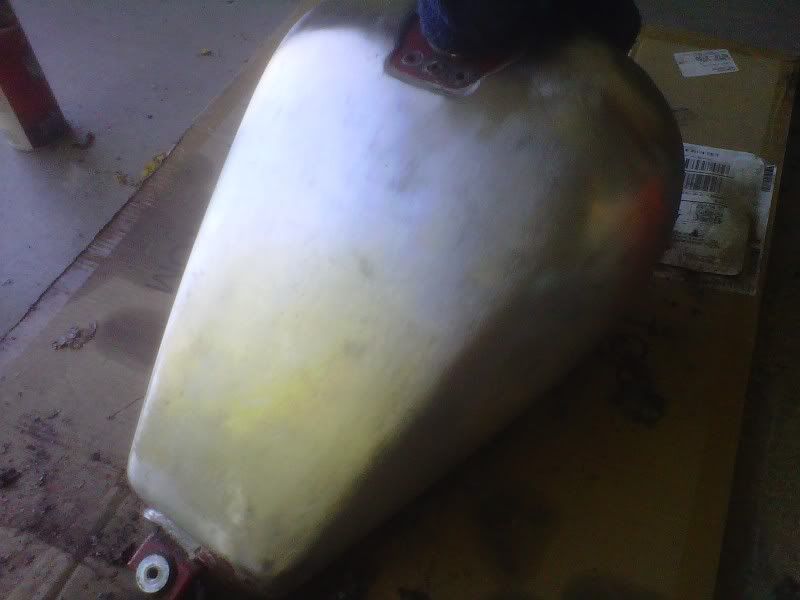 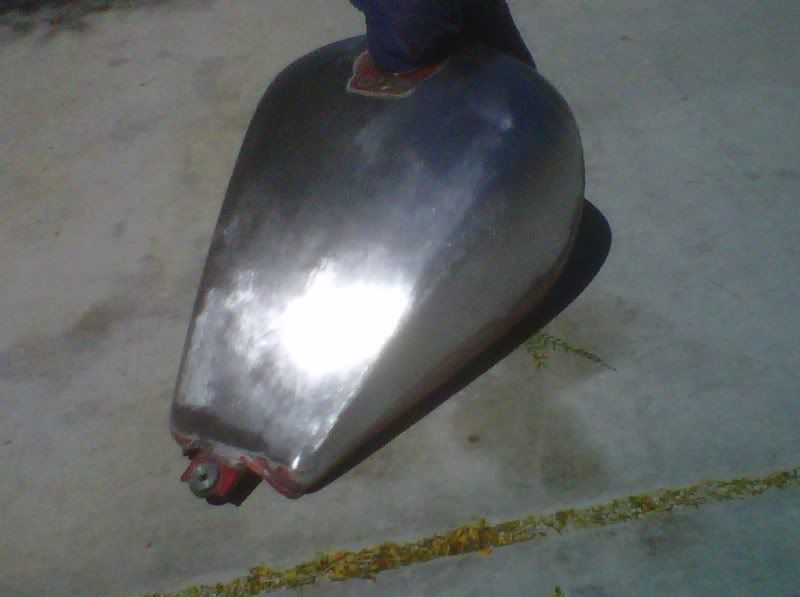 Starting to fix some dents and dings now. Dont make fun on my sloppiness LOL LOL 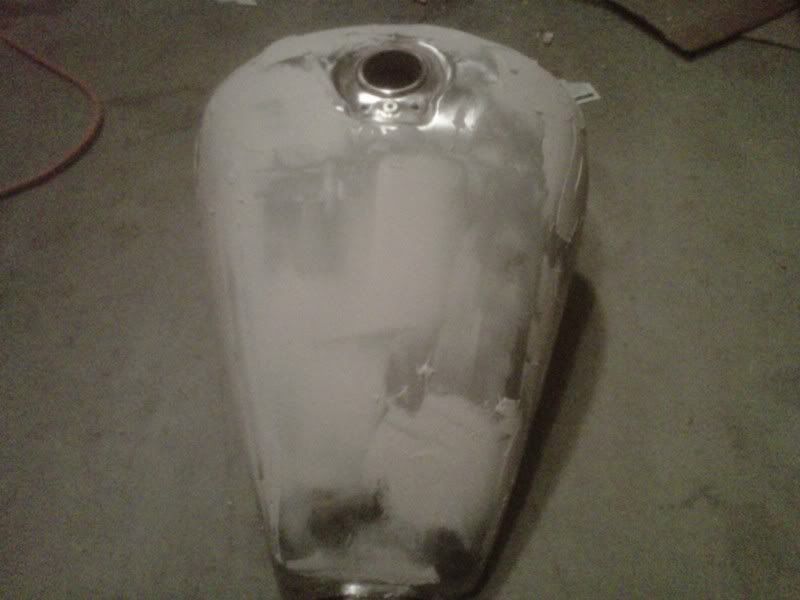 Hope to have it sanded down and primered tomorrow. Maybe painted as well. We will see how motivated I get LOL LOL |
|
|
|
Post by kdebruijn on May 3, 2011 17:55:39 GMT -6
ehh.. did the previous owner do a repaint on the tank.. and he left the kawa sticker on it..?
Do you know what color you're gonna paint it?
|
|
|
|
Post by crazycoyote82 on May 3, 2011 21:18:30 GMT -6
Yea the previous owner painted over all the stickers. Frekin stupid if you ask me. I painted the tank tonight. Its a copper color. My color scheme is Black and Copper. Not sure how well i like how it is turning out though. However I like the bobber look and that means it doesnt have to look perfect ya know..... Pics soon.
|
|
|
|
Post by kdebruijn on May 4, 2011 19:05:59 GMT -6
Well sometimes it gives a nice "ghostly" look from underneath the paint if you don't remove the sticker  |
|
|
|
Post by BenInPA on May 7, 2011 0:00:51 GMT -6
Not sure what you are using to paint it. If you are using rattle cans there is a 2k clear coat that another member mentioned. It is called Spraymax 2k Clear Coat. It works great and hardens like a professional paint job. Anyway I just repainted my tank. To get down to the bare metal I used an air die grinder. My cousin owns just about every air tool possible. lol The different wheels you can get for the die grinder work well. I used kind of a coarse one to get most of the paint off. Then I used a real soft wheel to strip the last of the paint and smooth it out. Pics are in photo section under "My '89 454 LTD" if you'd like to see the tank stripped. I started trying the sand blaster my cousin has but that didn't work well at all. To much rain around here made too much moisture in the air. Goo luck with the paint job. Can't wait to see the pics.
|
|
|
|
Post by crazycoyote82 on May 10, 2011 14:05:52 GMT -6
Have been making some progress. I painted the tank however not real happy with the look. I think I need to look into that better clear out of a can. 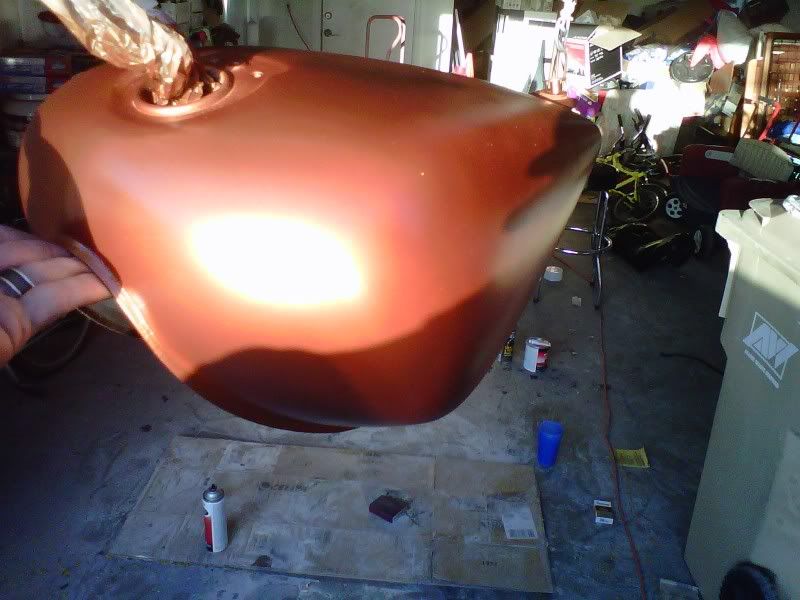 Also painted the gas cap while it was off. 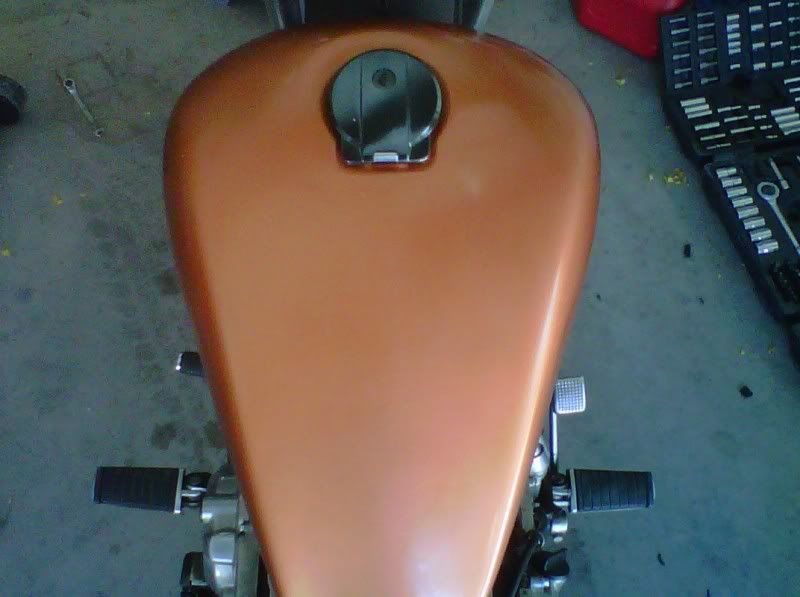 I bought the pod filters and installed them. I had a valve cover breather from a Chevy that I used as well. Any reason this wont work?? I also installed the can mod into the filters to help it. I have the new main jets on the way. It loves to bog down lol 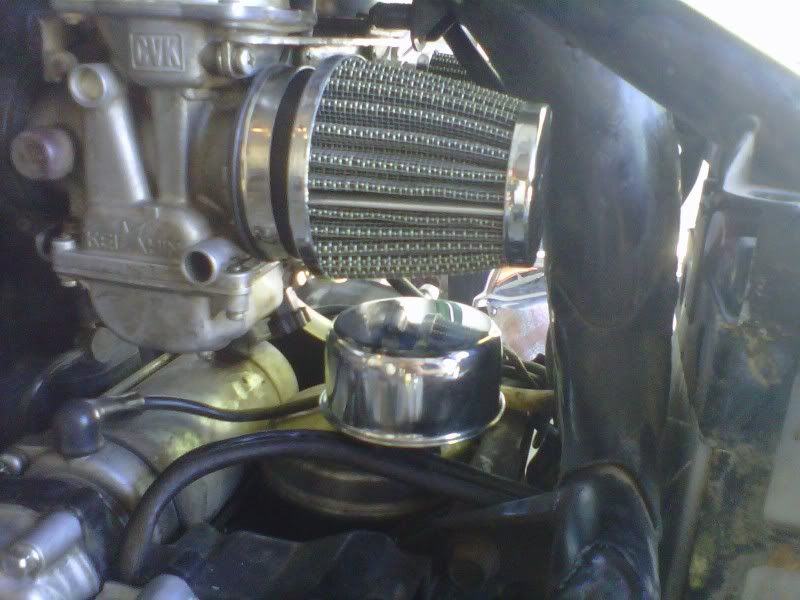 I got some 5/8 caps out of a assortment pack from autozone. 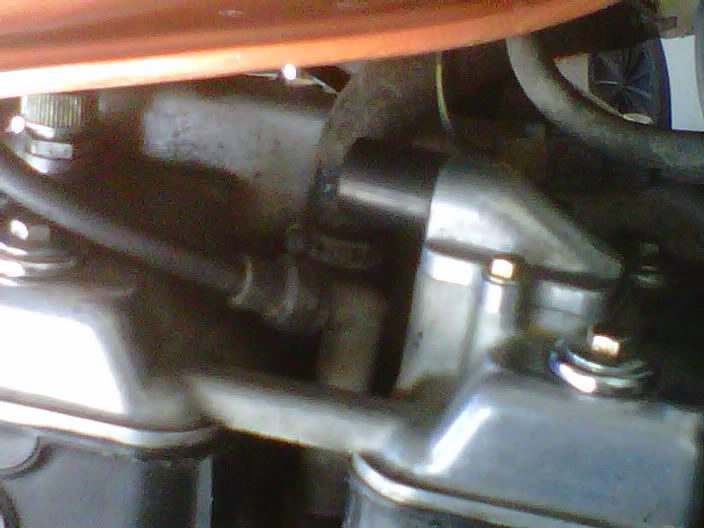 Im also working on the fenders as well. 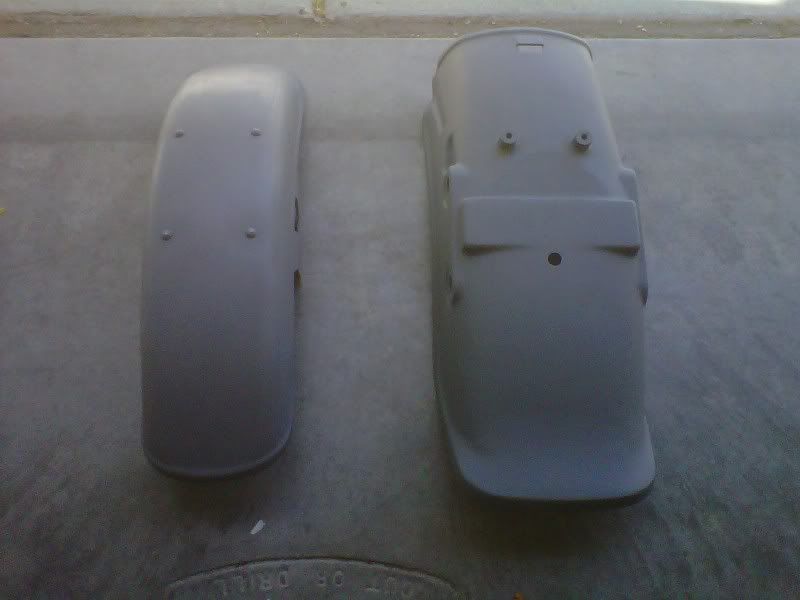 Also got board and went ahead and took care of the front forks. Still need to clean up the brake and wheels though. 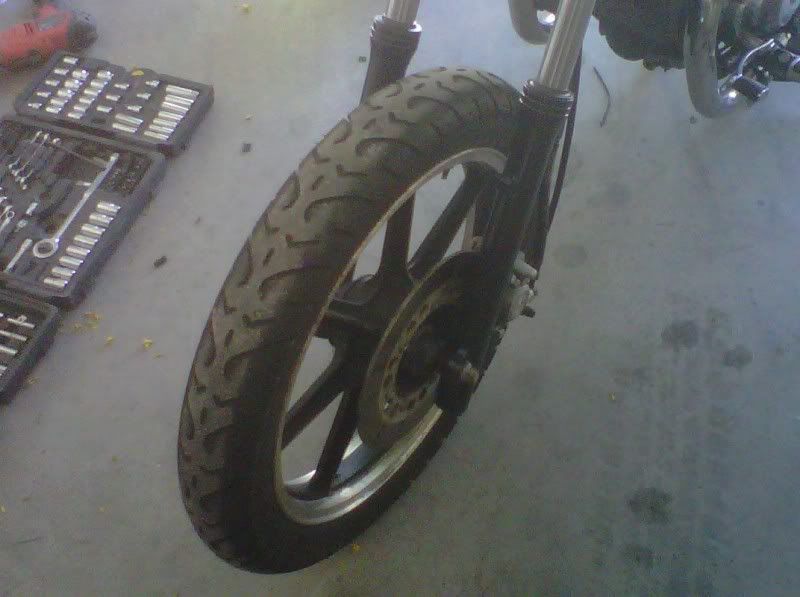 |
|
|
|
Post by eaglerider on May 10, 2011 17:41:28 GMT -6
I used these air filters right out of the box...no "can mod". if every thing else is right, they work just fine, and have for over 5 years. These Emgo filters are the only ones I would use. There is also a small filter that matches the air filters that GWK, I, and others use.
|
|
|
|
Post by crazycoyote82 on May 10, 2011 20:43:04 GMT -6
Once I rejet the carbs ill take them out and see if it makes a difference.
|
|
|
|
Post by crazycoyote82 on May 13, 2011 18:55:06 GMT -6
Today the new handlebars and jets arrived. I only had time to do one. Therefore the handlebars got the attention. I also got the exhaust cleaned up and painted the other day. What do you think?? Before 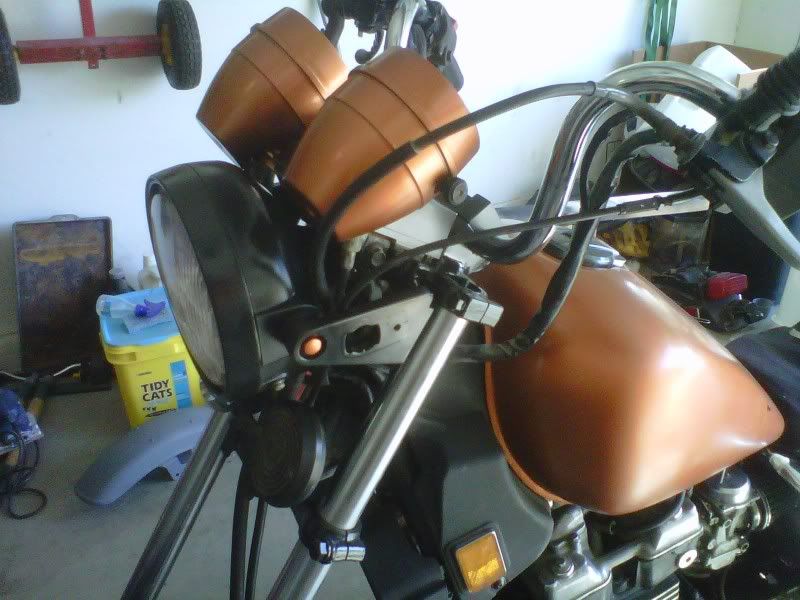 After  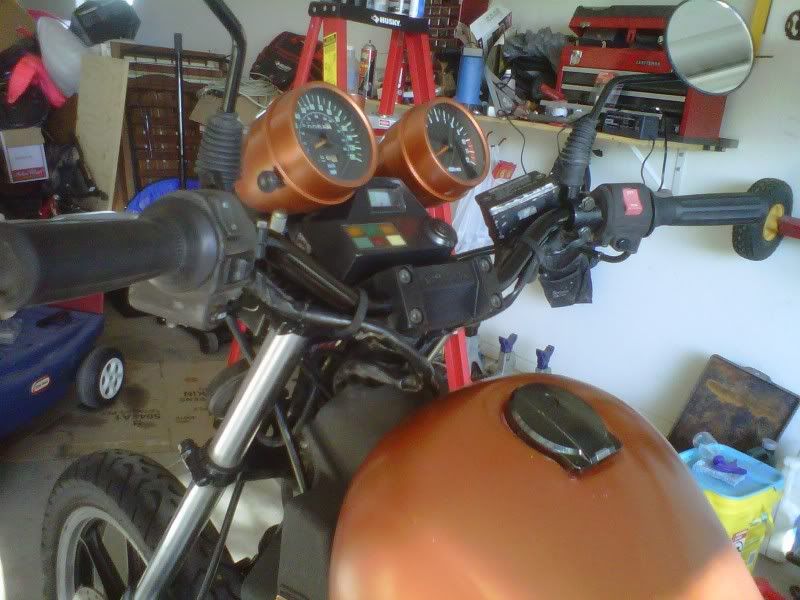 Heres the exhaust painted. 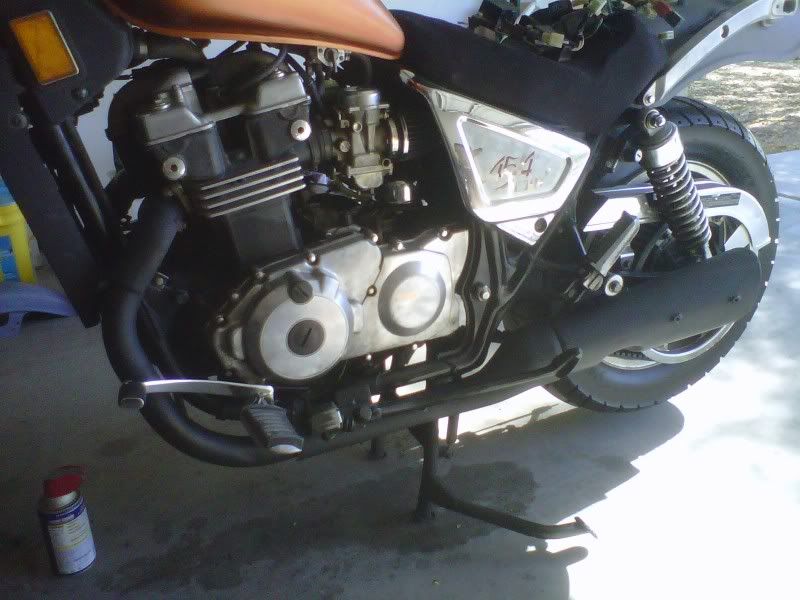 |
|
|
|
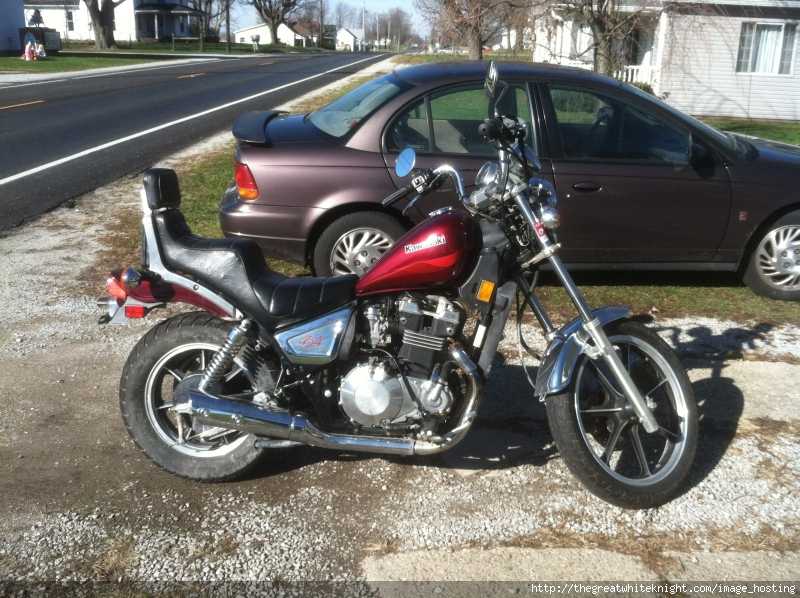
Post by crazycoyote82 on May 23, 2011 17:18:37 GMT -6
Heres how it sits right now. Still have a few things to do but for now this is it. lol lol 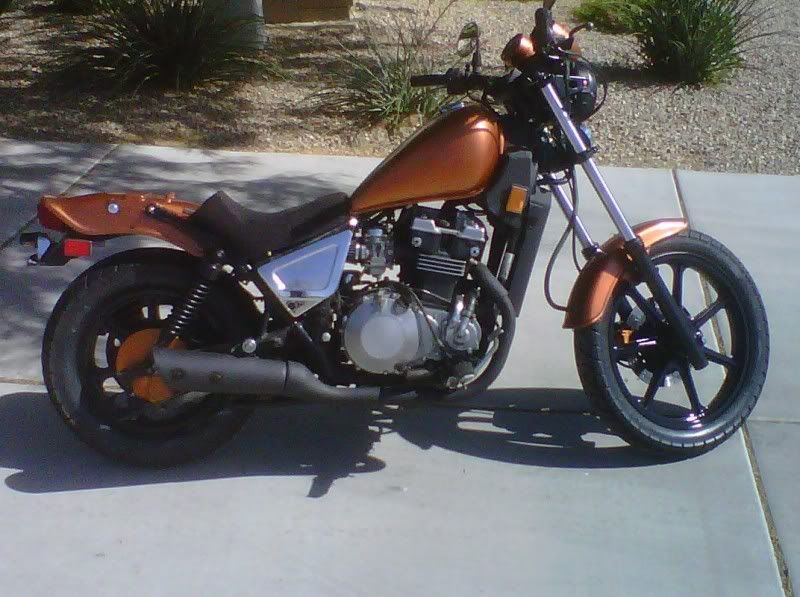 |
|
osttrefftwest
Junior Member
 '85 454LTD (hers; sold the 1200 Bandit...)
Posts: 144
|
Post by osttrefftwest on May 31, 2011 9:16:22 GMT -6
I'm digging that copper. Nice work!
|
|
|
|
Post by crazycoyote82 on May 31, 2011 9:24:35 GMT -6
Thank you. I have since repainted the side covers as well.
|
|
pony
New Member

Posts: 53
|
Post by pony on May 31, 2011 19:33:33 GMT -6
looks real good. did you do the side covers black as well?
|
|
|
|
Post by scubasteve on Jun 1, 2011 6:21:23 GMT -6
What did you get your handlebars off of?
|
|
|
|
Post by crazycoyote82 on Jun 1, 2011 10:26:57 GMT -6
Yes the side covers are black as well. The handle bars are off of ebay lol. Believe they were listed as European Bars.
|
|
|
|
Post by kawa85 on Jun 10, 2011 11:54:22 GMT -6
Man your bike looks sick. All it needs is a set of new handlebar grips and you're set. You really know what you're doing. And you banged it out quick looks like too. I painted my tank but the orange peel is still on there. How do I get it rid of it? I wet-sanded before and ruined it. This is my 2nd try. I guess you used the high heat rattle can for the exhaust? Will the krylon from home depot work on the exhaust? You got me psyched that I can do this now  |
|
|
|
Post by robertg on Jun 10, 2011 21:38:15 GMT -6
I painted my tank but the orange peel is still on there. How do I get it rid of it? I wet-sanded before and ruined it. This is my 2nd try. You need to wet sand it with 1500/2000 wet/dry paper. Lightly sand until the orange peel is gone and then buff to a shine. You need to make sure that you have enough clear on to start with so that you have enough to sand off. On my show bike I put 7 coats on(some may say that is too much) and I ended up sanding off probably close to 3/4. If you put too much on and don't sand it you can actually end up getting cracks in the clear. Good luck. Robert |
|
|
|
Post by crazycoyote82 on Jun 11, 2011 6:43:53 GMT -6
robertg pretty much covered the paint aspect. As far as exhaust paint goes yes its a high heat. I used the high heat paint from the local parts store. Cant recall the name right now. I still need new grips as well as finish the seat. Ive been moving lately and that has taken precedence over the bike. I need to redo my tank as well.
|
|
|
|
Post by crazycoyote82 on Jul 6, 2011 14:52:21 GMT -6
No new pics yet how i do have a update. Finally got it running good. After redoing the main jets I had a wicked stumble so to speak. I have since shimmed the carb needles. Now it runs like a champ. I got the blinkers back on and working. I replaced the side cover gasket due to a slight oil leak at high rpms. Now it seems that the next thing to fix is the fork seals. Never done it but there on the way as I type. Im tired of pulling back into the driveway after a ride to come back out a bit later and see a puddle of fork oil sitting there. I also bought a fuel filter for it that ill install probably tomorrow.
|
|
pony
New Member
Posts: 53
|
Post by pony on Jul 6, 2011 20:54:56 GMT -6
if you have a steady hand it would be cool to go over the raised numbers and letters with a pinstripe brush on the side cover with that same orange. just a thought.
|
|
|
|
Post by crazycoyote82 on Jan 21, 2012 13:46:09 GMT -6
Did a few more things that I have been wanting to get done. I cut a bit off of the stock rear fender. 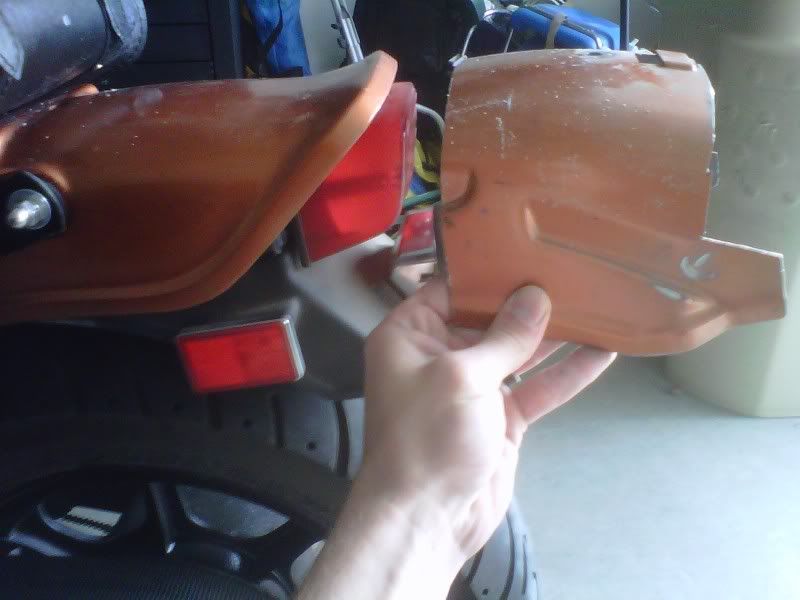 It helped get the tucked in look that I was after. 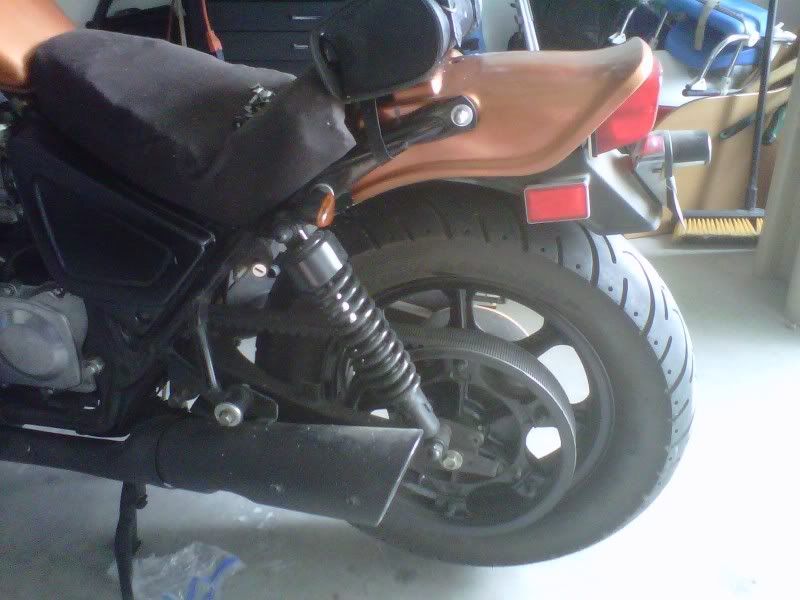 Then I didnt like how the tag holder looked. I took that off and relocated the tag. 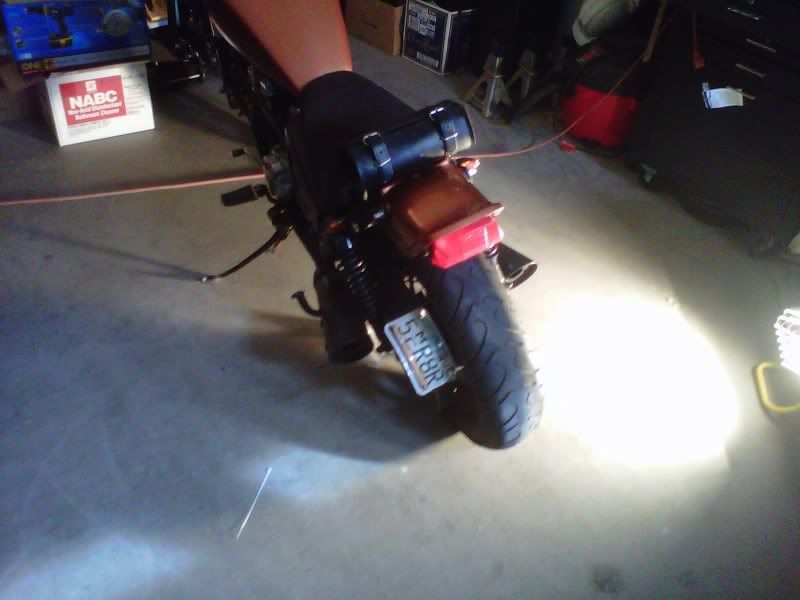 |
|
|
|
Post by samboitaliano on Jan 22, 2012 5:29:30 GMT -6
Looking good, really digging the copper on black. Nice work
|
|
|
|
Post by crazycoyote82 on Jan 25, 2012 0:26:32 GMT -6
just won a auction on some ls650 shocks. before and after pics to come!!!!
|
|
|
|
Post by crazycoyote82 on Jan 29, 2012 10:05:56 GMT -6
As promised..... Before and after pics of the shock install. Before. With a TON of gap. lol 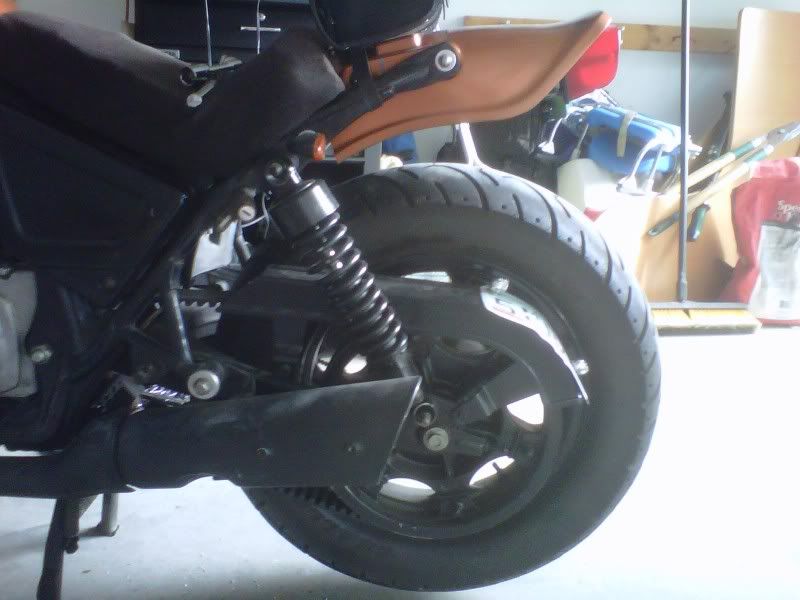 After the Install. I meant to take a pic of the bushings that i had to make for them but forgot to. 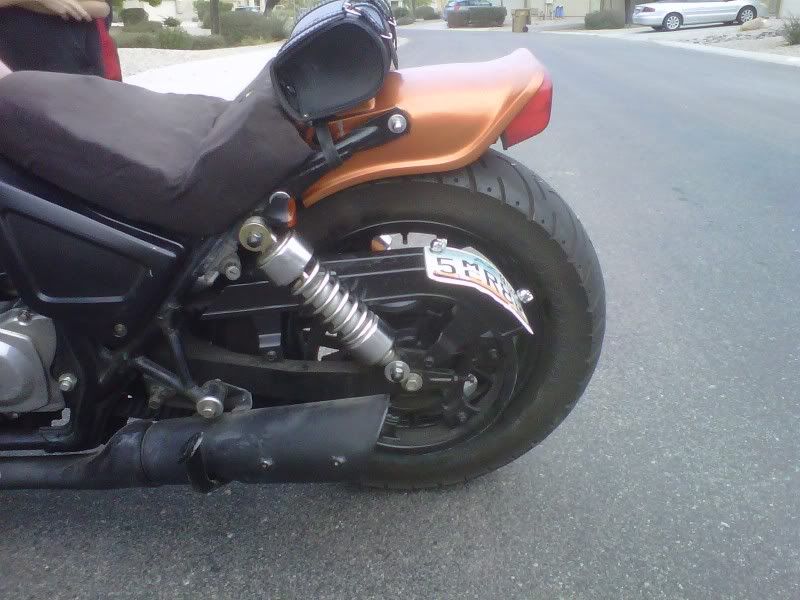 This is how it sits now. Im debating on some new handle bars. Maybe some sort of Z Bar? Not really sure.  |
|
|
|
Post by zekkfett on Jan 29, 2012 10:16:57 GMT -6
So what did you end up doing to solve the shock bushing issue?
|
|
|
|
Post by crazycoyote82 on Jan 29, 2012 11:05:02 GMT -6
It was in another post. However, I went to autozone and they had some bushings for a car that were CLOSE to what I needed. I had to cut and trim to get them to fit. But they went in and i got them in. It was a pain but you can see the results.
|
|
|
|
Post by crazycoyote82 on Jan 29, 2012 11:05:49 GMT -6
My next step is the wiring for the new tag lights.
|
|
|
|
Post by zekkfett on Jan 29, 2012 17:13:44 GMT -6
Forgot I had read that other post. Dumb me.... ;D
Mount a white led strip up inside the fender on the left side for the tag light.
|
|
|
|
Post by crazycoyote82 on Jul 17, 2012 17:43:55 GMT -6
So, I finally got around to finishing the seat. Heres the before. 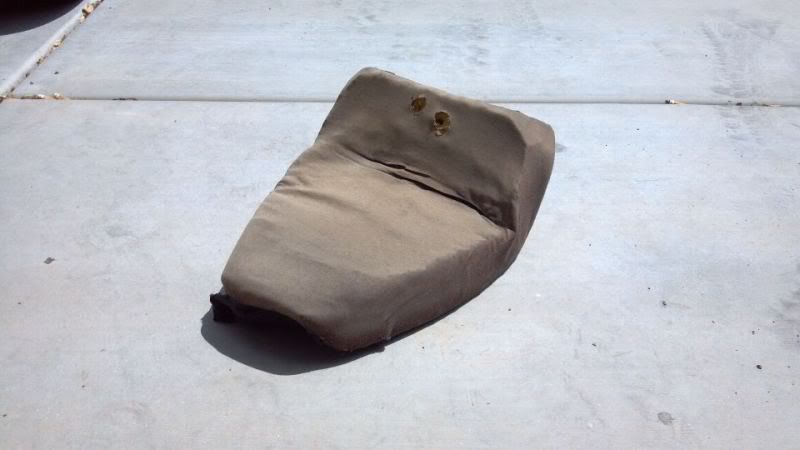 now taken apart. I had a tshirt on there for awhile. Which is not gone as well. 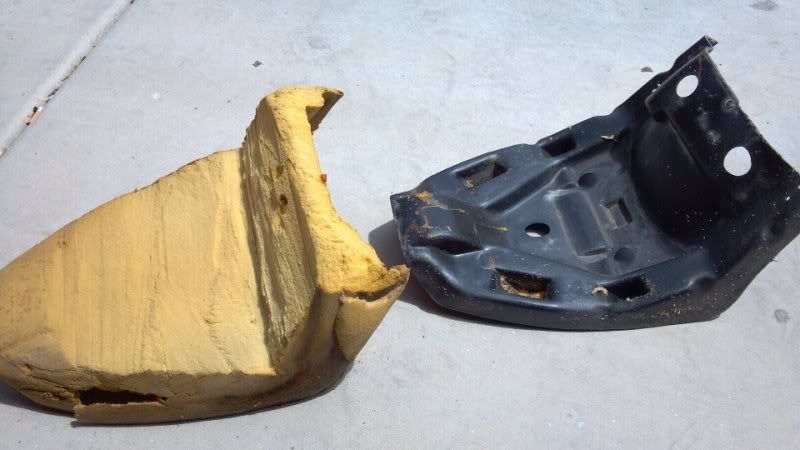 I started with all new foam etc... BUT forgot to take that picture. Heres a few pics of it completed. 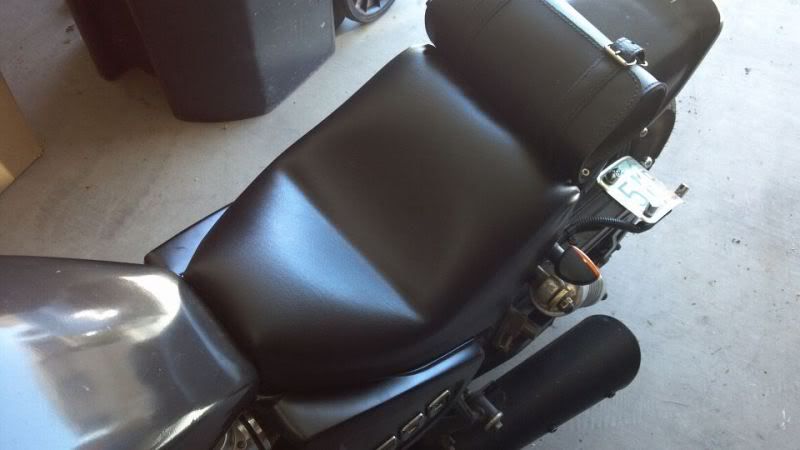 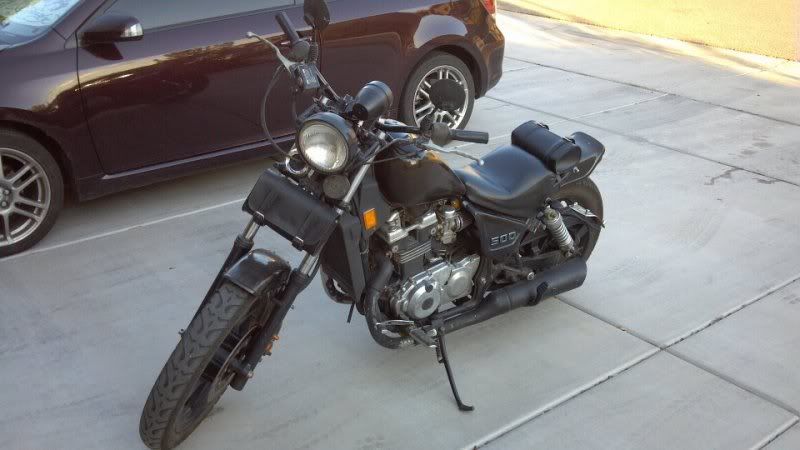 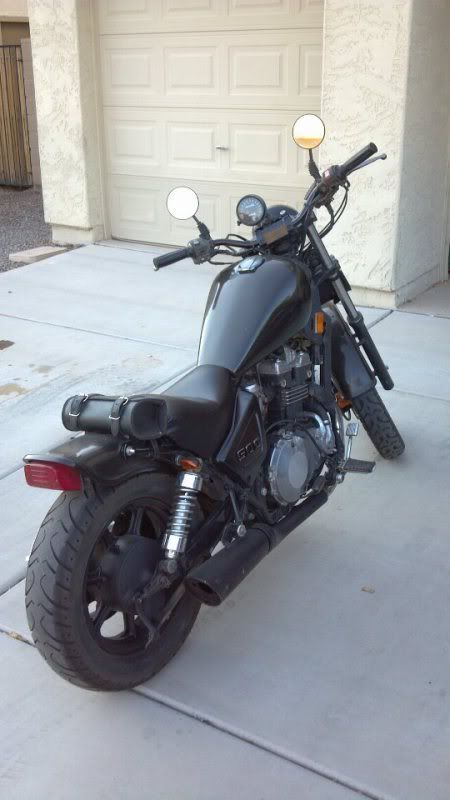 Forgot that I also repainted it a new color and moved the gauge around a bit. My Tach broke so I just took it off. |
|
|
|
Post by carpaltunnel on Jul 17, 2012 18:01:36 GMT -6
Can you explain your paint treatment? I'm interested in painting some parts of my bike and I'm not sure what would be best to color and clear-coat it. I'd like to paint my rims black and the red to match my redwall tires that I'm working on.
Thanks - the bike is lookin' good!
|
|