|
|
Post by chopperfreak2k1 on Aug 7, 2012 1:04:42 GMT -6
so what mods would be required to try to fit a 170/80/15 rear tire? if you can recall.
i can not wait to see this bike finished. it is right up there with K.I.T.
|
|
|
|
Post by eaglerider on Aug 7, 2012 6:56:43 GMT -6
Hey, Chopper, This one is much more "modified" than KIT was. Kit was basically customized stock...on this one, about the only thing "stock" is the middle part of the frame, so it is just about a completely "different" bike than a 454. A lot of hard, thought-out work is going into this bike, and I, too am looking forward to seeing the completed project. There are a few things I would like to do to a couple of frames, to build a bike, but dont think I could ever come even close to this one.
|
|
bwhittet
Junior Member
 it is by will alone I set my mind in motion.
Posts: 186
|
Post by bwhittet on Aug 7, 2012 15:12:50 GMT -6
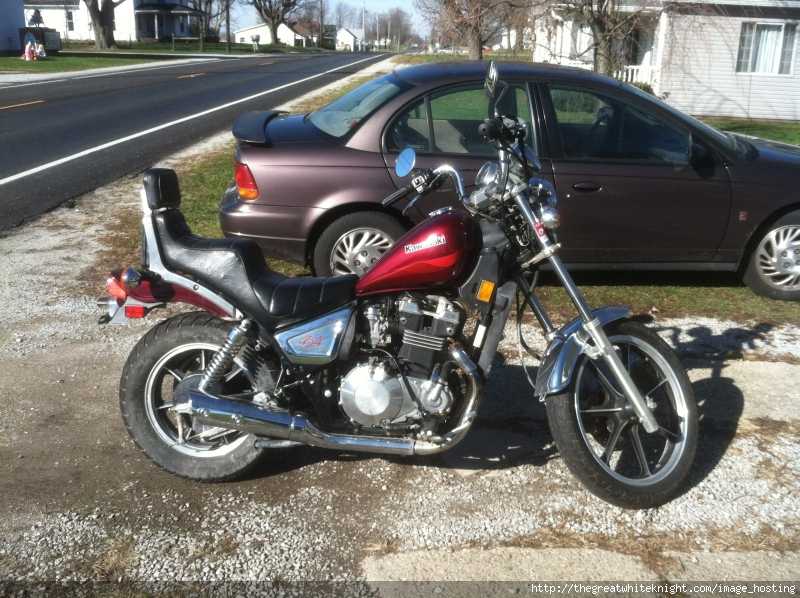
And yet I love KIT. What a beautiful customized bike. I bought the 454 with the intent to mod it. The small but powerful engine and belt drive seamed like a good base to start from. I kind of jumped in head first on this one. Wider rear tire is a lot of work. Possible if you can operate a lathe, mill machine, and you might need a welder. Three new spacer bushings need to be made for rear axle/wheel. Donor wheel brake mount probably will need modifying. A lot of measuring and calculations (add, subtract, and divide) are needed to make sure you build the right size bushings. I made prints of the ones I made to share. Swap bearings from 454 wheel to donor wheel. Then figure out how to operate new rear brake. Pic show a 454 with wide tire and hard-tail conversion someone here found listed on craigslist. Looks like they used the stock brake pedal but modified it to push the hydraulics of the donor wheel. They took it even farther and did the belt to chain conversion and got and even wider tire on.  (NOT MY BIKE) Wish i was done with mine and had time to kill. Love to develop a "kit" that could easily add a wider tire to the 454. Maybe I'll work on a separate thread showing my prints and info on my wide tire conversion. I realize this kit would not have any real market. But it is fun to help guys here put smiles on their faces. |
|
|
|
Post by chopperfreak2k1 on Aug 7, 2012 20:17:02 GMT -6
wow that sure does sound like a lot of work! but given the needed info i could have a local shop turn the pieces so if you decide to share the info that would be really great!
the 454 you show here is a real beauty for sure! definitely some inspiring bikes here on this site.
Eagle, KIT was all class and in my eyes may never be replaced. it was just a very regal scooter that commanded your attention. i wish it was still around...
|
|
|
|
Post by eaglerider on Aug 7, 2012 21:13:15 GMT -6
As far as I know, its still in Oklahoma, but do not have any other info.
|
|
|
|
Post by chopperfreak2k1 on Aug 10, 2012 7:22:58 GMT -6
it would be great to get a few pix maybe get the current owner to join the site
|
|
|
|
Post by eaglerider on Aug 10, 2012 9:28:36 GMT -6
 Maybe...I hate to say this, but sometimes, a new owner does not appreciate the work that was put into a bike, and does not take care of it, the way it should. I'm not saying that this is the case with KIT, but if it happened to be, I would not want to see it. I am very sure that the new owner was made aware of the forum & website, and I do not know his name, or even what town/city he lives in.
|
|
|
|
Post by chopperfreak2k1 on Aug 10, 2012 23:06:55 GMT -6
yeah, maybe it's better to remember KIT the way it was...
|
|
bwhittet
Junior Member
it is by will alone I set my mind in motion.
Posts: 186
|
Post by bwhittet on Oct 16, 2012 8:46:11 GMT -6
Rode bike to work today. Mind you it is only a couple miles but still. Rode it! No blinkers, no seat, no problem. I was tired of trying to "finish it". So i just threw it together and put so time in the saddle. Bike looks like it does in the videos at the end of page one.
I still have a dead spot in mid throttle. Guess I should shim the needle some more. Full throttle was great though. So I must be close with my jet size.
Anyway I've been way to busy to work on bike much. So to be in the saddle finally was a great feeling. Huge list of things to do before bike is done. Front seals, seat pan, blinkers, small coolant leak, some sort of speedo/tach, muffler hangers, and more....
Later
|
|
mradam
Junior Member
Posts: 214
|
Post by mradam on Oct 16, 2012 14:11:15 GMT -6
current pics??
|
|
nikolero
New Member
 Poor and alone cowboy!!!
Posts: 27
|
Post by nikolero on Dec 20, 2012 12:22:19 GMT -6
hello there!hello from Greece...
Can you tell me the size and the brand of the air filters you use?
and if i have to reset the carburators?
thanx a lot....
|
|
|
|
Post by Blaine on Dec 20, 2012 14:29:00 GMT -6
hello there!hello from Greece... Can you tell me the size and the brand of the air filters you use? and if i have to reset the carburators? thanx a lot.... Pod filters are 54mm & the popular brand is "Emgo"   |
|
|
|
Post by eaglerider on Dec 20, 2012 15:43:14 GMT -6
And some have had to re-jet, and do a couple other things, some have not had to do anything.....I did nothing but put the filters on. There are several posts as to what other members have done, here on the forum.
|
|
bwhittet
Junior Member
it is by will alone I set my mind in motion.
Posts: 186
|
Post by bwhittet on Jul 29, 2013 12:55:58 GMT -6
Been riding the project now again. Hard to get a lot of time to work on it with an 18 month old son running around. Few weeks ago decided to go into work hour later and proceeded to dig out bike from corner of garage. Installed battery, update license plate tabs, check fluids, pump up tires, increase rear mono shock preload on spring, and wrap pod filters with rags (still need to get jetting fixed.) Bike started up nice. Rode it to work. Mind you with no seat my short ride to work is not comfy. Was just sitting on thin foam pad on top of my wiring mess. Decided I needed to find time to make a seat pan. SO.....
 
Got pan fiberglassed last night. Took near an hour this morning to get it peeled off. I'll get it trimmed up and take some more pics. Then I'll need to find some foam for it.
Hey I'm ridding it again.
To do: Needs a speedo (thinking Striker or Vapor Digital Gauge from trail tech). Weld in rear mounts for exhaust. Trim, pad, and upolster seat pan. Mount ignition key somewhere. Mount and wire in bar end blinkers. Get carbs jetted right (might hire this one out for better time schedual.) Lots of odds and ends need finishing.
|
|
|
|
Post by Jet⚡Black on Jul 29, 2013 13:40:31 GMT -6
|
|
bwhittet
Junior Member
it is by will alone I set my mind in motion.
Posts: 186
|
Post by bwhittet on Aug 13, 2013 16:33:07 GMT -6
link to video of startup
link to video of bike running, Exhaust revving sound.
new pics
 

|
|
bwhittet
Junior Member
it is by will alone I set my mind in motion.
Posts: 186
|
Post by bwhittet on Aug 19, 2013 14:33:31 GMT -6
wiring under seat.  |
|
bwhittet
Junior Member
it is by will alone I set my mind in motion.
Posts: 186
|
Post by bwhittet on Aug 23, 2013 9:13:00 GMT -6
Added foam to seat pan. Foam is actually just $3 worth of Menards carpet padding. About three total layers trimmed and shaped to what you see here. I would have liked to have find a firmer foam for the base layer. This carpet padding is holding up well for now.
I decided a while ago to with a more upright sitting position. Originally I wanted a lower seating position than I ended up with now. I like to have a more aggressive feel to the bike handling compared to the laid back of a cruiser. So I created this higher saddle position.

Now to stretch some skin over it.
|
|
bwhittet
Junior Member
it is by will alone I set my mind in motion.
Posts: 186
|
Post by bwhittet on Sept 10, 2013 8:39:07 GMT -6
Solved my lack of speedometer problem. Bought an X-grip RAM mount, made an aluminum handlebar clamp for x-grip, and loaded a free GPS Dash app onto my iphone. Only $25 if you don't count my time.
X-grip and home made mount.

Screen shot of GPS dash.

Works for now.
Ram mount link
Video of x-grip used on motocross track. This is what convinced me to buy the x-grip. It holds tight and I can use any iphone case i want.
|
|
|
|
Post by eaglerider on Sept 10, 2013 14:24:33 GMT -6
WOW!!! Never knew this could be done! Is there an app for Android??? This "older guy" is not too up to date on these fancy things. LOL
|
|
|
|
Post by zekkfett on Sept 10, 2013 19:34:22 GMT -6
WOW!!! Never knew this could be done! Is there an app for Android??? This "older guy" is not too up to date on these fancy things. LOL Oh yeah! TONS of GPS speedo apps for Android. I've used my GPS speedo app to see how much the stock speedo is off. BTW, for my bike, @ 55mph, it is only off MPH, so 60 Indicated is 55 actual. If you buy a decent motorcycle GPS, most have a GPS speedo function. |
|
bwhittet
Junior Member
it is by will alone I set my mind in motion.
Posts: 186
|
Post by bwhittet on Apr 28, 2014 16:39:06 GMT -6
Made some new foot pegs. First set were solid mount bar aluminum and were scary when I would drag a peg in a corner. Made these pivot style. 
|
|
|
|
Post by mrcrowley13 on May 5, 2014 23:08:22 GMT -6
I just read this thread twice, awesome build sir!!! How are things going on the bike ?
|
|
bwhittet
Junior Member
it is by will alone I set my mind in motion.
Posts: 186
|
Post by bwhittet on Jul 14, 2014 8:47:58 GMT -6
Rode the bike a bunch this spring. It needed new tires, forks needed new seals, frame needed some welding, and rust was really staring to get the frame. So I stripped the bike down and started to address those issues.
I rebuilt the forks. took a long time but went well.
Bought new tires and had them mounted. www.motorcycle-superstore.com/6181/i/shinko-006-podium-rear-tire
I sandblasted the frame . Lucky for me a coworker had a cup held style media blaster I could borrow to do the parts that would not fit in the sandblast cabinet at work.

Yesterday I spent most of the day sandblasting the small steel parts and priming everything. Primed with Chasssis Saver silver color.

I hope to get to paint the top coat this week.
|
|
|
|
Post by ltd454bobber on Jul 18, 2014 8:10:21 GMT -6
With the en500 swingarm what belt did you use?
|
|
bwhittet
Junior Member
it is by will alone I set my mind in motion.
Posts: 186
|
Post by bwhittet on Jul 22, 2014 7:50:25 GMT -6
En500 belt
|
|
|
|
Post by ratboybuilds on Dec 31, 2014 7:33:16 GMT -6
great build!
|
|
divot
New Member
Voices in my head>Battle of Disarm
Posts: 61 
|
Post by divot on Mar 9, 2015 20:08:09 GMT -6
Bad Donkey- wish I was as talented with metal work.
Can you help explain how you attached the rear fender as where the fender came from or if you made it too. Thanks
|
|
bwhittet
Junior Member
it is by will alone I set my mind in motion.
Posts: 186
|
Post by bwhittet on Jul 8, 2015 7:16:03 GMT -6
Pics of putting it back together.


Still need to fix exhaust and mount it properly. Need more restrictive air filters. I like Pods but I would like more restrictive airflow. Any suggestions shoot me a message. Sorry I've been gone so long. Miss you guys. Been trying to catch up on what everyone else has been doing. Some nice looking bikes here.
|
|
|
|
Post by heinz1 on Jul 8, 2015 15:38:54 GMT -6
Good looking bike it gives me some inspiration to modify mine
|
|


 Maybe...I hate to say this, but sometimes, a new owner does not appreciate the work that was put into a bike, and does not take care of it, the way it should. I'm not saying that this is the case with KIT, but if it happened to be, I would not want to see it. I am very sure that the new owner was made aware of the forum & website, and I do not know his name, or even what town/city he lives in.