|
|
Post by barclayclose on May 20, 2012 19:51:30 GMT -6
hey sdcruzin, where did you get the seat like in the second pic? I just picked up a 1985 454 and i want have a 2 seat capacity but i hate how bulky the stock seat is.
also where did you get those handle bars?
thanks.
|
|
|
|
Post by sdcruzin on Aug 15, 2012 21:32:26 GMT -6
hey sdcruzin, where did you get the seat like in the second pic? I just picked up a 1985 454 and i want have a 2 seat capacity but i hate how bulky the stock seat is. also where did you get those handle bars? thanks. 3 months later... that is the factory seat, I cut it off and wrapped it and actually stitched it back together. it was a descent 2 seater, didn't look too bad. the bars are bikemaster superbike bars. these bars have a 2" rise because I bought the drag bars first, and no way! all the controls hit the tank. and when I put the superbike bars on, I still welded on 1" extensions that i cut off the factory bars, to give more clearance for the controls. |
|
|
|
Post by sdcruzin on Jun 4, 2013 23:41:57 GMT -6
yep. suzuki savage shocks. ls 650 so here she is now 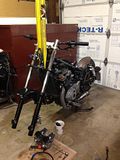 |
|
|
|
Post by sdcruzin on Jun 14, 2013 13:25:35 GMT -6
ADDICTED TO SUBTRACTION------- changing up the gauges, and first I cut the top clamp like this, thinking I would use the two mounting spots from the headlight ears for a bracket to mount the new gauges on... 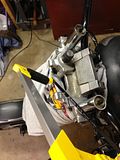 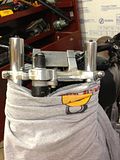 BUT, I HAVE THIS ADDICTION... these black marks are where I cut off the handlebar clamp, and the headlight ear mounting tabs the casting of the top clamp/handlebar clamp area is hollow on the side without the ignition hole, so a patch is getting welded in the hole, then I will finish it and remount for pictures (handlebars?) 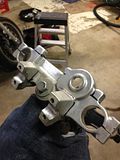 and while I'm in the area... I shaved back these huge ugly brackets that were/are way too big for the flimsy piece of plastic they hold in place 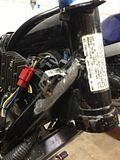 |
|
|
|
Post by sdcruzin on Jun 14, 2013 13:40:59 GMT -6
ADDITION IS FUN TOO ---- relocating the fuse box and horn, so i cut off the fuse box end of the mounting bracket, and welded it on the frame in a new location. 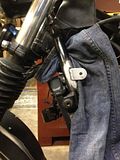 heres a picture with the box mounted, you can also see the trim job I did to the plastic neck covers, more about that later 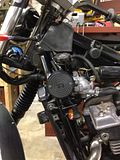 |
|
|
|
Post by sdcruzin on Jun 14, 2013 22:23:39 GMT -6
edited
|
|
|
|
Post by sdcruzin on Jul 5, 2013 23:29:13 GMT -6
edited
|
|
|
|
Post by sdcruzin on Jul 11, 2013 23:45:14 GMT -6
I went to my friends shop to use his drill press for the long bolts going through the face of the simple bar stock bracket I designed, and he insisted on milling the whole thing, cnc, real quick. 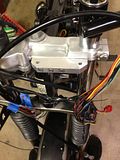 i tapped the triple clamp for the 3 bolts going into the face with lock washers. this bracket finish looks a little out of place, but its very effective here's a pic of the bracket up close 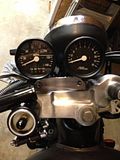 as you can see i went with clip-ons for handlebars. to me it was the best solution for the forks sticking up through the triple clamp so far. it also gets me more arm room |
|
|
|
Post by sdcruzin on Jul 11, 2013 23:59:44 GMT -6
you can see in an earlier picture where I cut the plastics that cover the frame in front of the gas tank. on the right side, it is cut right above the coolant reservoir. so to make that look better i painted it black, but left a window for easy maintenance. 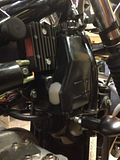 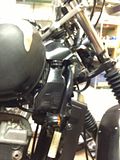 |
|
|
|
Post by sdcruzin on Jul 12, 2013 0:18:38 GMT -6
here's what she's looking like for now. you can see the brake mc/lever, it's off a 92 ex500, so the angle is much better for this application, and still kawasaki 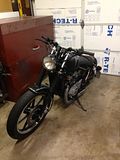 and in this picture you can see the fresh paint on the radiator cover, and the relocated horn. also the new ss brake line, making that one disc work even harder. and the new speedo cable, off a kz440, keeping it kawi. 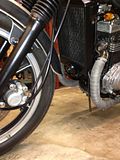 |
|
|
|
Post by sdcruzin on Jul 15, 2013 11:39:52 GMT -6
the new gauges required a little more work than expected. of course I knew there was a custom bracket to be made, but when they arrived, there were additional instructions.  ok. source some grommets, hardware. no prob. wire together according to diagram, no prob. all turn signals flashing like hazard signals!?! oh yeah. i read about this on the web already, was hoping the unit I got had rectifier diodes wired into it already. nope now go to radio shack. I buy the smallest ones 50V- 1A. solder them in and shrink tube like all the other connections I did for the gauges. 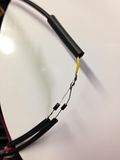 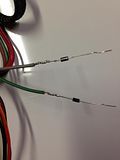 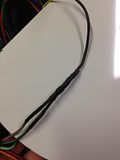 signals all good now, and all indicator lights in gauge perfect. |
|
|
|
Post by sdcruzin on Jul 17, 2013 22:16:04 GMT -6
I love this bike! and I love this angle. 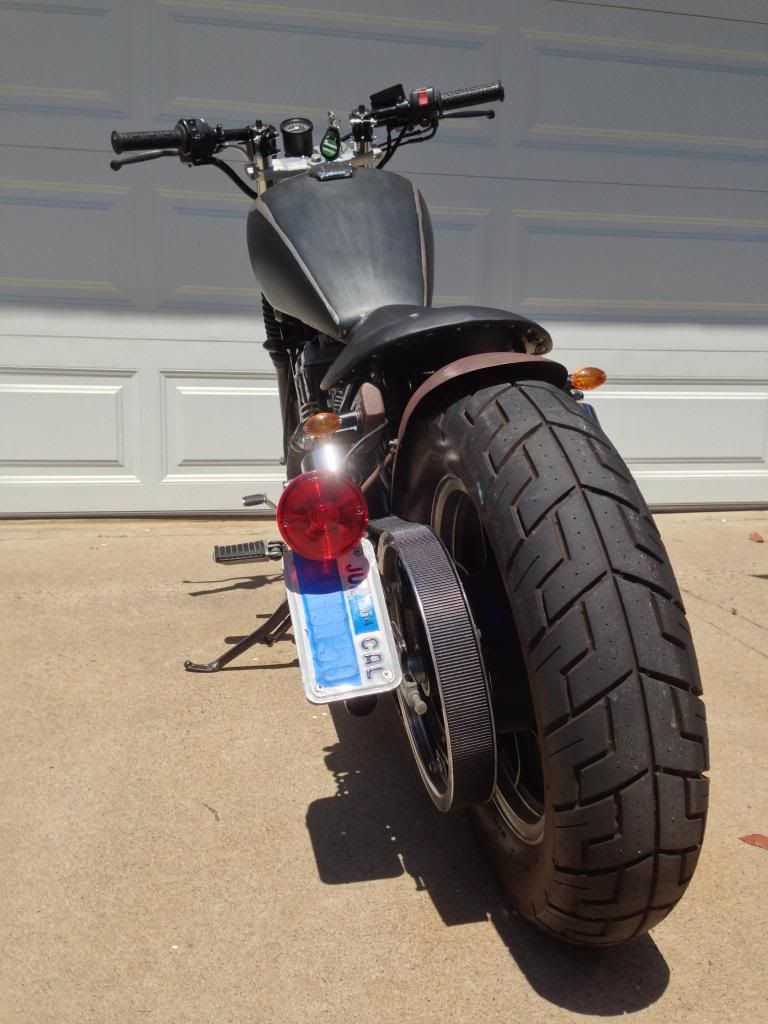 |
|
|
|
Post by sdcruzin on Jul 17, 2013 22:43:30 GMT -6
didn't really like the first license plate bracket I designed, but it did get the job done. I saw this cool shock mount bracket online, and decided to copy it sorta. mine is cut with jig saw, hole saw, and 4.5" grinder. Stoked! 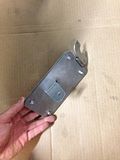 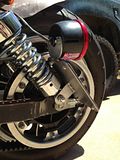 new shocks arrived. time to kill some more chrome! |
|
|
|
Post by nuclearpanda86 on Aug 5, 2013 17:54:33 GMT -6
Just got me a 454, and im a total newbie at this, i found a pair of ls650 shocks for my bike, so what all did you have to do to get those suckers on?
|
|
|
|
Post by nuclearpanda86 on Aug 5, 2013 17:59:45 GMT -6
Mainly what im asking is, what all do i have to mess with so that everything is right? Will it screw with the length of my belt, etc.
|
|
|
|
Post by eaglerider on Aug 5, 2013 23:15:43 GMT -6
All u do is remove the old shocks and replace them with the LS650 ones.....then, you do have to re-adjust the belt tension, otherwise, the belt will be too tight, and that leads to trouble and extra expense...possibly a new belt.
|
|
|
|
Post by nuclearpanda86 on Aug 6, 2013 10:56:38 GMT -6
Awesome, thanks for the info...now one more question...how do I adjust the belt tension? Lol. Like I said...I'm completely new to this and trying to build a first bike to be proud of, so any help is extremely welcome.
|
|
|
|
Post by eaglerider on Aug 6, 2013 14:17:23 GMT -6
loosen the rear wheel...it moves front and back...that's also the way the rear wheel/sprocket is aligned. If you do not have a manual, then u need to get one...it gives you directions on how to do many things, and maintain your bike. And for new owners, it is a very much needed item. We do have an on-line manual that u can refer to...download and install our 454 Toolbar..it is there, and makes navigating thru all our "features" much easier.
|
|
|
|
Post by sdcruzin on Jun 25, 2014 10:29:15 GMT -6
working on the bobber again! i don't know how to finish it, i just keep changing things. really its all part of the bigger picture, good thing I enjoy working on motorcycles. LOL so I took another shot at the seat mounts I made and I like the new setup much better. 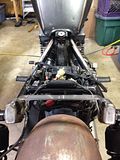 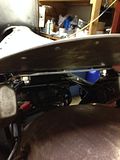 i welded a piece of flat metal that i bent the ends on, across the back . it has holes for studs coming out of the bottom of the seat pan, and i got 1/8" thick rubber washers that pad the seat to bracket contact. the seat pan is thick enough that the studs are tapped and threaded through the seat pan, not tack welded. They aren't studs really either, they are ss 8mm bolts. |
|
|
|
Post by sdcruzin on Jun 25, 2014 11:08:53 GMT -6
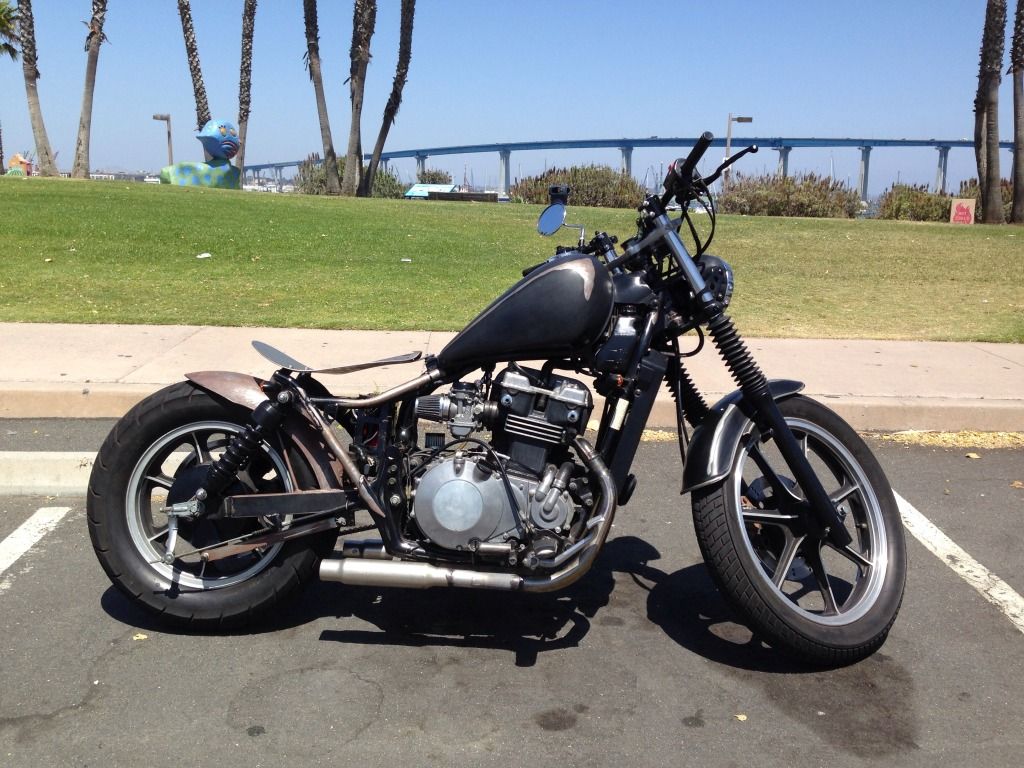
GOIN BALLISTIC!! (literally though, not figuratively) My regular battery is dead so i got a Ballistic 4 cell LiFePO4 battery to help shrink the battery box area. 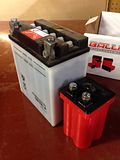 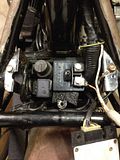 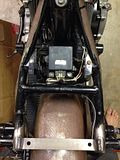 first picture you can see size difference, second pic, you can see relocated position, with new electronic flasher relay tucked in next to it, and that other thing...(LOL -have to look and see what these other relay looking things are on the schematic) third pic, you can see it all fits nicely under the IC ignitor, i used the foam that the battery came packed in to pad under and around it for now. I took her out for a spin, all good until the cheap flasher relay burned out, for some reason they sell them in 2 packs on eBay...  Coronado Island, Coronado Bridge in the background , San Diego |
|
cuzzi
New Member

Posts: 41 
|
Post by cuzzi on Jun 27, 2014 16:07:22 GMT -6
What size are ur clip ons?I ordered 37mm and there too big
|
|
|
|
Post by sdcruzin on Jun 28, 2014 14:08:42 GMT -6
they are EMGO 36mm clip ons.
|
|
|
|
Post by gambler936 on Mar 25, 2015 13:31:48 GMT -6
i know this is an old post but if you could tell me how you mounted the seat in the second picture i really like how that looks
|
|
|
|
Post by 2crows on Jul 18, 2015 10:43:37 GMT -6
Id like to see a closer pic of how you mounted the tag. What seat is that??
|
|