|
|
Post by gerardp on Apr 29, 2015 5:22:17 GMT -6
Hello, I am new on this forum, live in Holland and have my Kawasaki 454 for 22 years now. This winter I had the idea to chance my motor into a Bobber. I looked on the internet for ideas and the looks that I find important in a Bobber (also on this forum) Last weekend mij Bobber was ready to ride   This is when I started, it was a Chopper 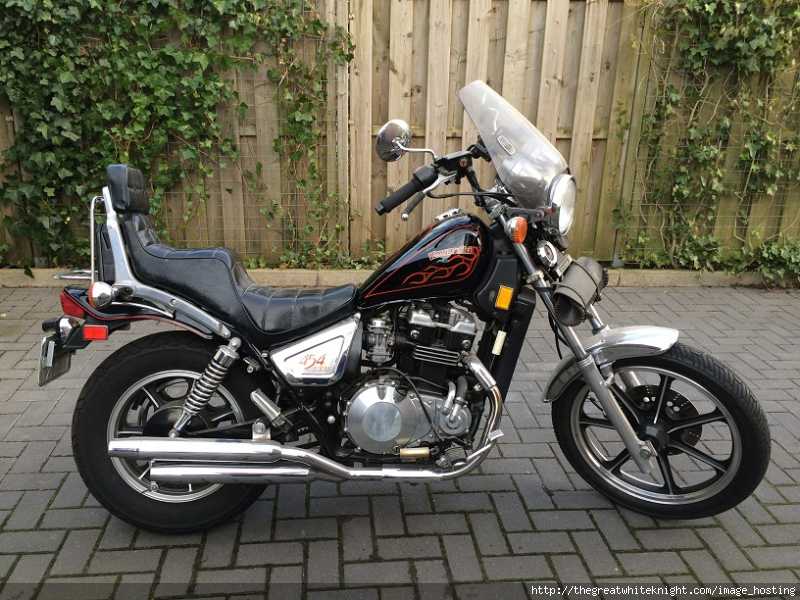 |
|
|
|
Post by eaglerider on Apr 29, 2015 7:01:47 GMT -6
good job.  |
|
|
|
Post by gerardp on Jun 3, 2015 6:47:26 GMT -6
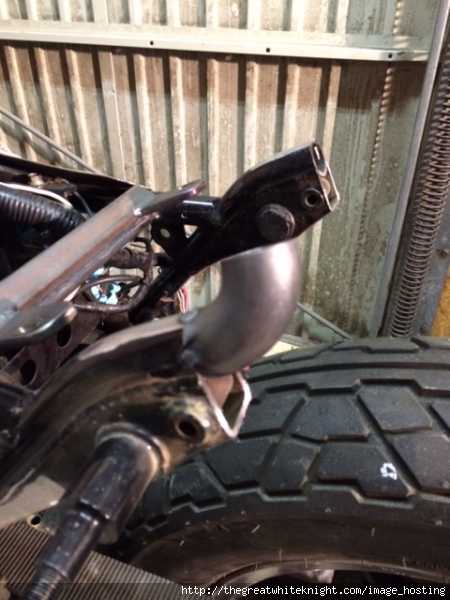
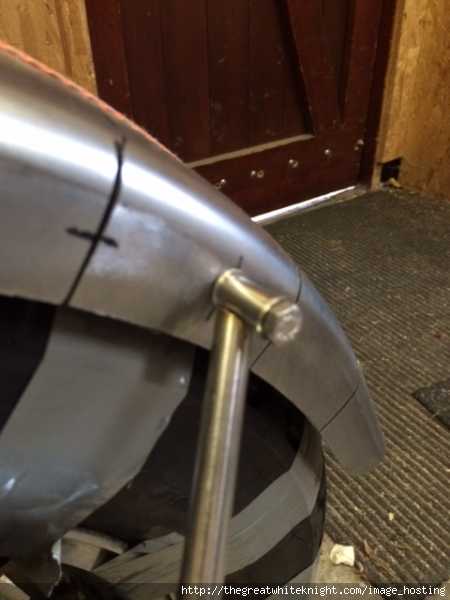
I like to show you how I did it with some text and pictures I took Everybody is making his own Bobber on his own way. For ideas. I looked on the Internet and came to the conclusion that I had to chance the following parts Handlebar Monoseat Rear-fender Blinkers Tail Light I found some websites with the perfect parts. For the monoseat I found a website in Germany, Dock66.de I ordered the next part: Chopper Sitz large, extra flach, schwarz 11-0085 58,31 EUR  To fix the seat on the bike. I had to remove the sadlemount and rear-fendermount. When you place the seat on the frame you see a gap between the seat and the frametube.   I closed this gap with a plate of metal. First I made a model out of carton. The plate is bent and welded to the frame. (first weld the seatmount then the metal plate!!!)       At the front of the seat I made a metal strip witch fits in the metal pipe that is welded on the frame. For the back of the seat a piece of U-metal in the same angle of the seat is welded on the frametube The two bolds on the seat fits in the metal plates welded to the U-metal (in the same angle of the seat) When you want to put the seat on the bike, you first put het metal strip on the front of the seat into the metal pipe and let the bolds on the back of the seat fall in the holes in the metal strips.     Then the rear fender, I found a universal rear fender at the webshop of BRcustoms. I ordered the next part: FLAT REAR FENDER, 6 INCH WIDE (Motorcycle Storehouse art:505590) - euro44.72   This is an universal fender for wheels from 15” to 17”. The Kawa-454 has a 15”rear-wheel there by the arch of the fender does not follow the rear-tyre, this has to be changed. On the Internet I found an video-clip how to do this, I decided to do the same thing with my rear-fender   We want to bend the fender over the tyre, to be sure there is enough space between the fender and the tyre we tape a airhose over the tyre (diameter hose +/- 2 cm.)   Draw some lines over the fender (between the lines 10cm. see picture) and make cuts with a grinder-disc. After this put the fender over the tyre and finish it with a Strap, the cuts become smaller. If the fender does close over the tyre weld the cuts Now you can loosen the Strap and after grinding the welding seams your fender has the right shape. |
|
|
|
Post by gerardp on Jun 3, 2015 6:52:44 GMT -6
|
|
|
|
Post by gerardp on Jun 3, 2015 6:58:34 GMT -6
|
|
|
|
Post by camarata on Jun 3, 2015 7:13:11 GMT -6
Looks really good man. I'm building mine now and will definitely use some of your ideas.
|
|
|
|
Post by gerardp on Jun 3, 2015 7:14:22 GMT -6
For the tail-light I used the original licence-plate-light, removed the black light and mounted a cateye taillight MINI-CATEYE TAILLIGHT, CHROME (dimensions 68mm x 41mm)   The innerside of the original licence-plate-light is important. We use this again to protect the electrical wires for the tyre. To flatten this plate more we screw the plate on a piece of wood, make a cut with the grinder-disc, close the cut with a hammer and weld it again, the protection plate is now much thinner. On the inside of the fender in the edge we weld little pieces of metal to mount the electrical wire from the taillight to the swingarm.   |
|
|
|
Post by gerardp on Jun 3, 2015 7:17:47 GMT -6
The Handlebar is from Highway Hawk, model Fighter. All the cables are compatible. Cable replacement is not needed.  |
|
|
|
Post by gerardp on Jun 3, 2015 7:24:33 GMT -6
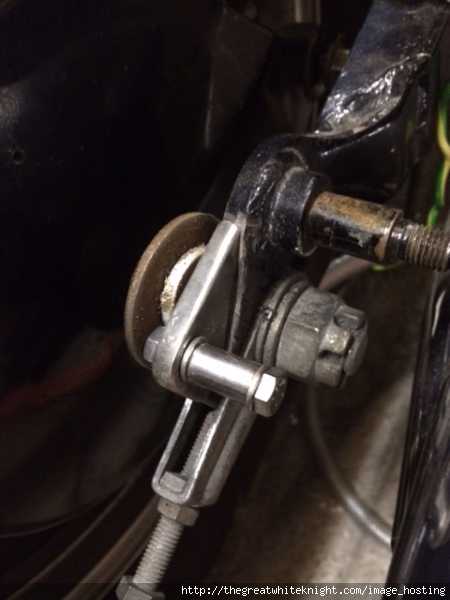
The blinkers are from Highway Hawk, Turnsignal set MINI Diamond Nr. 68-5081 At the rear you can use the M8 holes behind the suspension. For the front blinkers you use the foot of the original blinkers. In the hole for the electrical wire you can put the M8 blinker.   The wiring harness has to be chanced al the electrical parts witch were mounted under the buddyseat has to be put under the monoseat, where is less space. First a remove the tape to see how the wires are connected. Then I see that the wires are not only go from the front to the end, but also from the left to the right. I marked al the connecting wires with different colours of zip-ties To make nice cables I ordered cable-Jackets by Techflex.nl When I finished the job it was an exciting moment. Would the engine start?  YES !!!! I made no mistakes PFFFFF!!!!!!!!!!!!!   Then everything under the monoseat   |
|
|
|
Post by gerardp on Jun 3, 2015 7:30:12 GMT -6
|
|
|
|
Post by gerardp on Jun 3, 2015 7:42:14 GMT -6
|
|
|
|
Post by eaglerider on Jun 3, 2015 17:27:09 GMT -6
|
|
|
|
Post by johnathanb on Jun 24, 2015 17:48:15 GMT -6
This is a very very nice conversion. One of the best I've seen yet. This summer or next I was thinking about getting my ltd bobbed. It may have to wait seeing all the work that is needed in order for it to be done nicely. But VERY swell on the "How to" tips. !
|
|
|
|
Post by heinz1 on Jul 5, 2015 8:00:34 GMT -6
Nice bike! What kind of exhaust is that?
|
|
|
|
Post by gerardp on Jul 27, 2015 3:40:40 GMT -6
The Exhaust is from Jardine. I bought them 20 years ago. I do not know if they are still being made by Jardine Jardine-artikelnumber: 14-3802-01 (Only Tapered ends were available) This is a scan of the original folder, if you find them secondhand I also placed the original instructions.   |
|
|
|
Post by jez on Sept 1, 2016 12:39:46 GMT -6
Nice job. I'm just about to start mine from a frame and 5 boxes of bits. Hope it turns out as nice as yours.
|
|
|
|
Post by gerardp on Jan 21, 2019 7:39:59 GMT -6
I have been driving the Bobber for some time now. It drives great To create some more space between the rear-fender and the frame I am going to install a swingarm and belt from an EN500. First I have to find the time to do this and the necessary materials. I will take pictures again during the project. |
|
|
|
Post by actionverb on Jan 22, 2019 13:26:35 GMT -6
Definetly pulled some inspiration from your work and detail to get my bobber going. Thanks for taking the time to share.
|
|


 YES !!!! I made no mistakes PFFFFF!!!!!!!!!!!!!