|
|
Post by dadbike on Nov 26, 2016 12:28:26 GMT -6
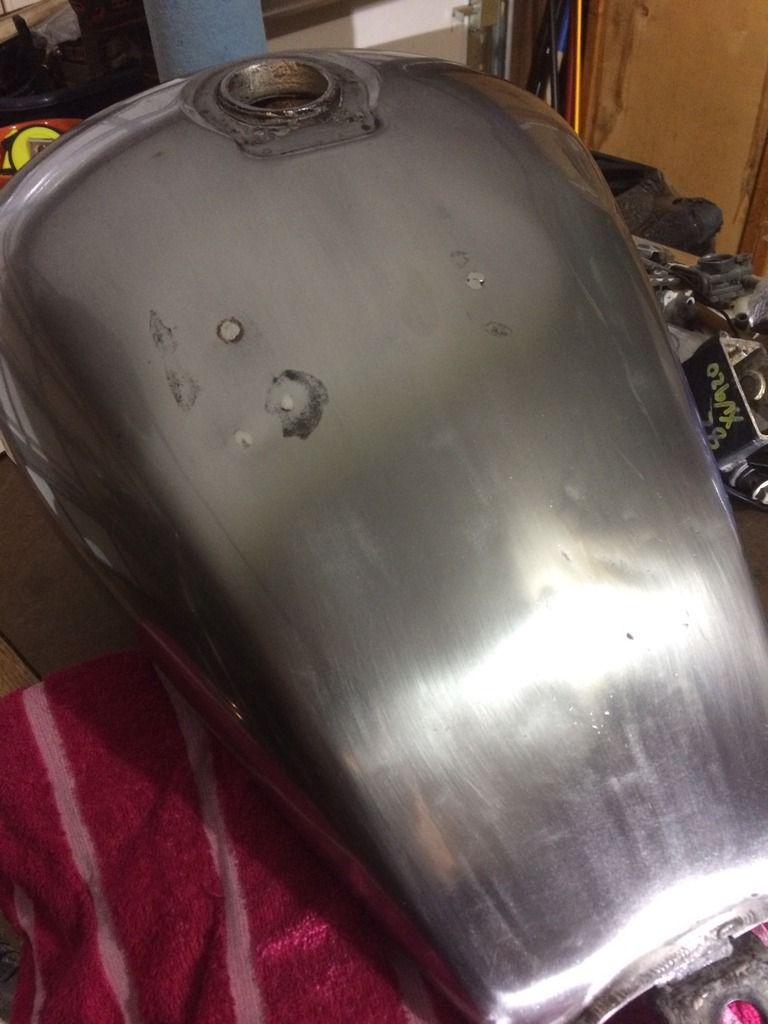
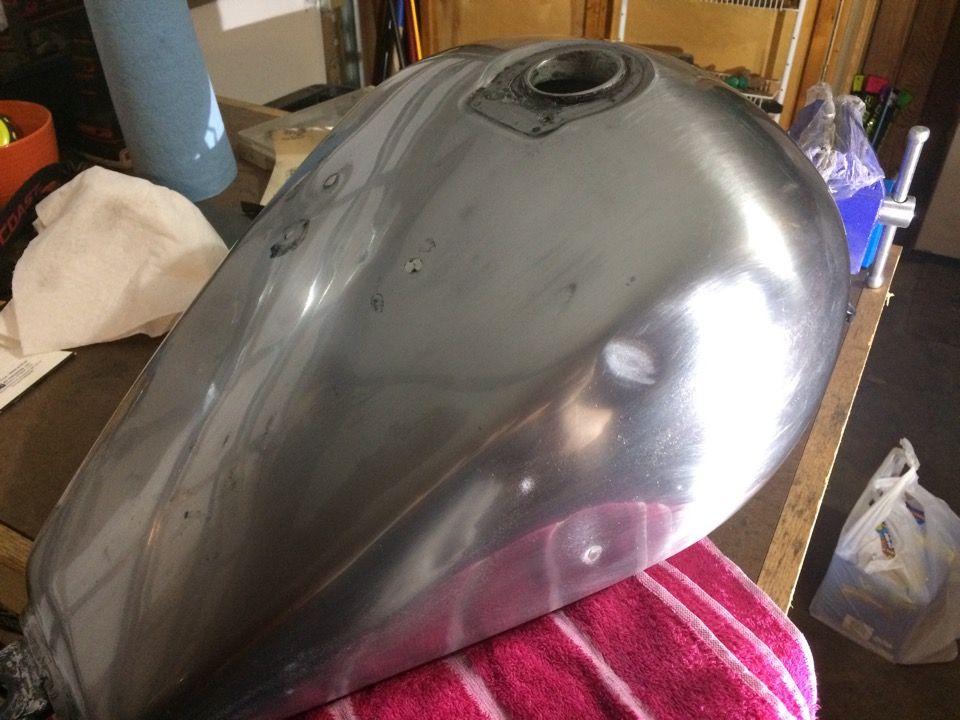
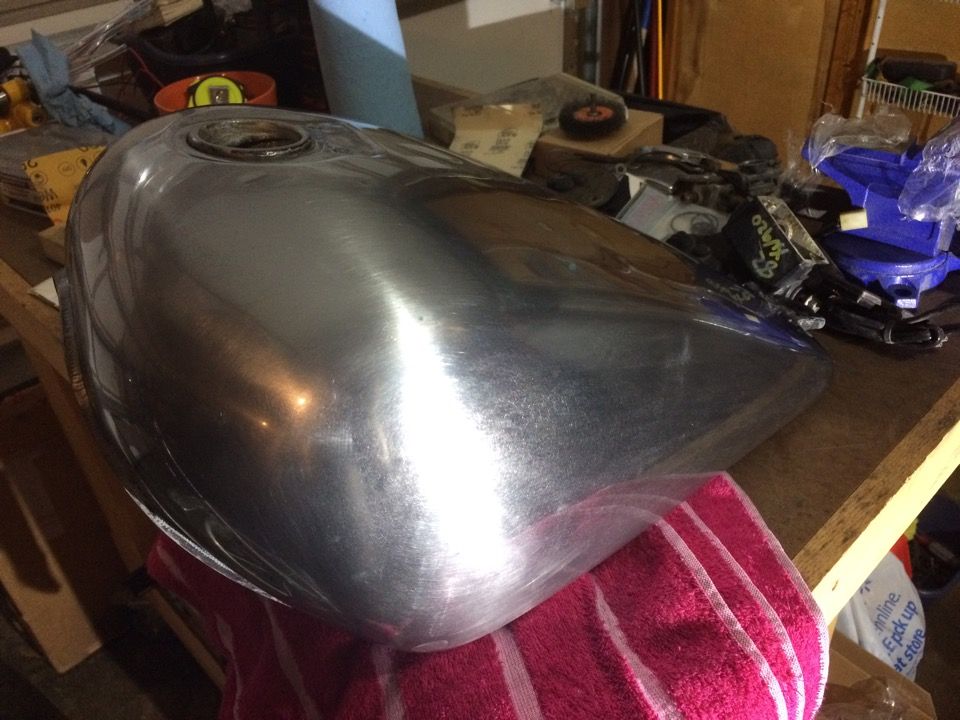
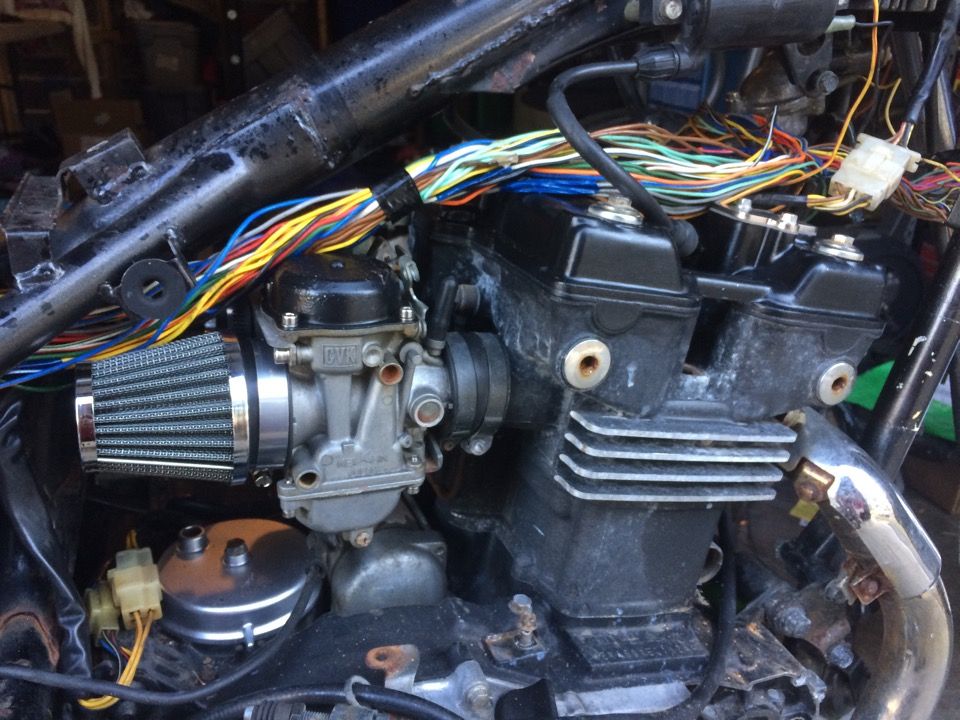
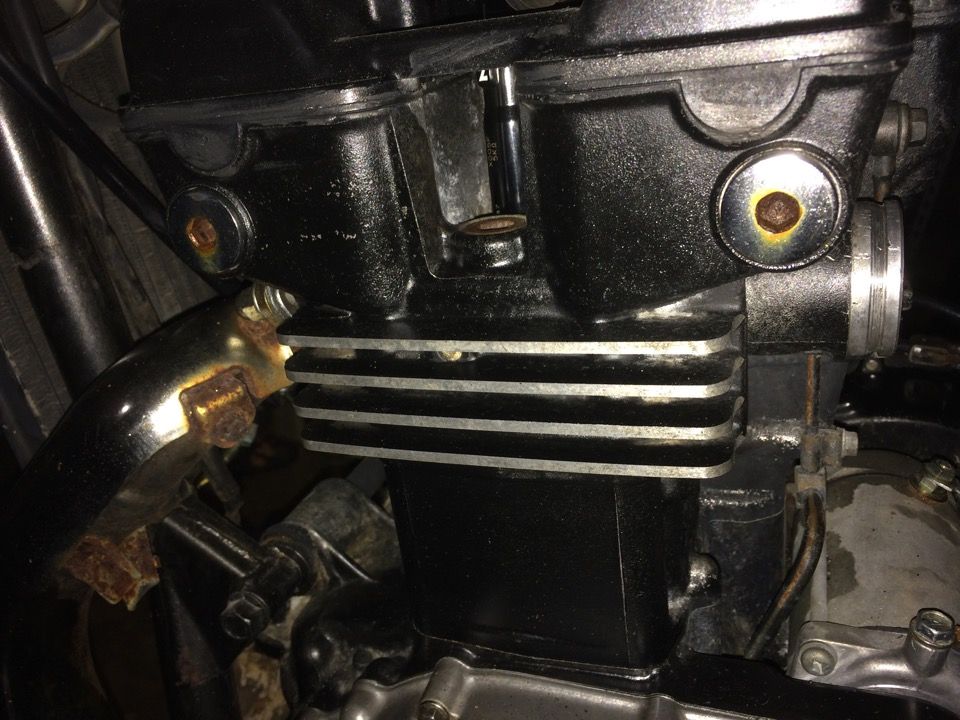
Hi, I'm Michael. I've got 11 kids (adoption) and great life insurance... I desperately needed just a little bit of "me time" in my life by way of another motorcycle. A friend found the Craigslist ad for 2 motorcycles for $500 so within about 3 minutes we decided these would be ours, the 1982 Virago 920 for me and the 1985 Kawasaki 454 LTD for him. Neither running, but both complete with good titles. As you can imagine my spare time is extremely limited but I didn't need to be on the road immediately, just a good project for some stress relief. Then the next week a friend of a friend GAVE me a 1986 Kawasaki 454 LTD, with title, exactly like the one we picked up for my friend! The more I've read about the 454 the more I like it. I got the Yamaha running but have put it on the back burner for now as I wait for a single carb manifold and will buy a new flat slide. This has allowed me to focus on the 454 and yesterday I got it running for the first time. So far I've bought a new battery, bought a radiator from ebay, cleaned the carbs and replaced the float bowl gaskets, adjusted the valves and gave the cover a quick paint job. Next up is to fix the front brakes, adjust the clutch cable, replace a couple of leaky o-rings on the carbs (the reason for the blue towel under the carbs in the video below), and install the "euro" style handlebars that I picked up. After that will come new Shinko tires for front/rear and probably new brake shoes for the rear while I've got the wheel off. I decided to go with the slightly larger 110 and 150 tire sizes after reading about it here. Future plans would include painting the tank and fenders and cutting/molding/upholstering the seat. The day I brought it home, much to my wife's horror. "But it was FREE!" didn't resonate with her like I hoped it would.  Valves, cams, all that looked ok. You might be able to notice how gross the outside of the motor is, which is to be expected after sitting under a tree for a couple of years. Not sure it can be cleaned up, will probably have to paint it if I want it to look any better.  I was shocked when it fired right up so easily. |
|
|
|
Post by joe on Nov 26, 2016 14:35:14 GMT -6
AWESOME! With 11 kids you're going to need a few more project bikes LOL. Tell the wife there's no better price than free! And you gotta love your sons response 'you got it running!' They never have faith in dad do they?
|
|
|
|
Post by eaglerider on Nov 27, 2016 6:21:52 GMT -6
Starts up and sounds like a 454 should!!!!!! Congrats, good job!!! Oh, with some Mother's polish, and a lotta elbow grease, that engine will shine like a mirror!!!!!!
|
|
|
|
Post by dadbike on Nov 27, 2016 19:48:33 GMT -6
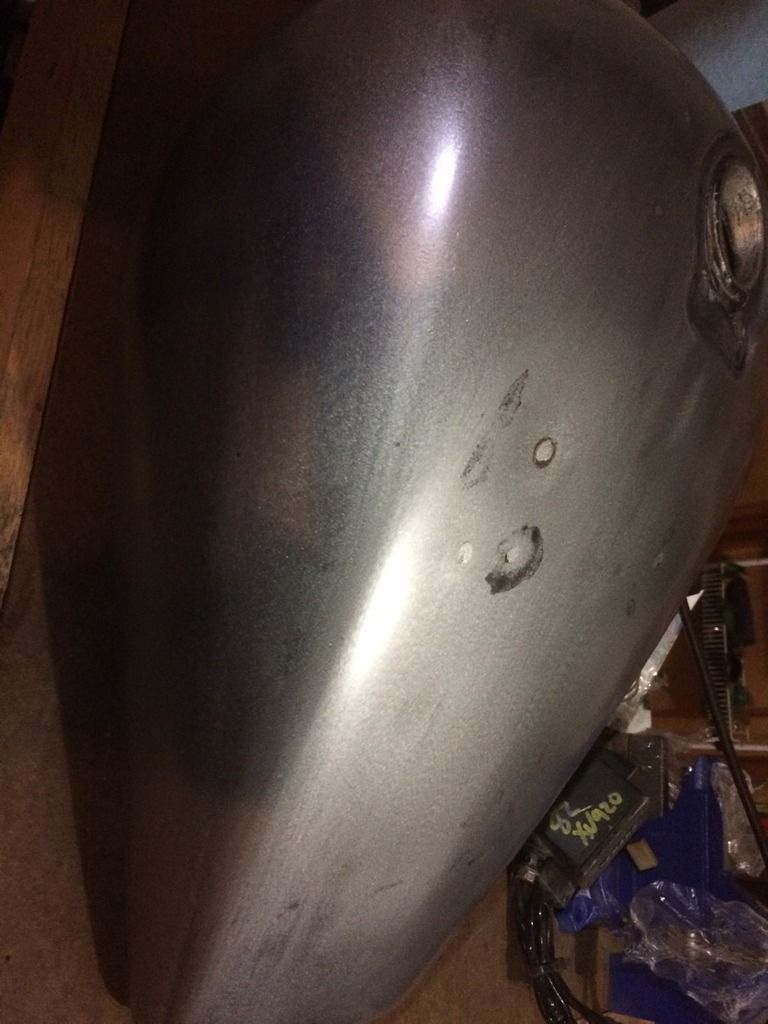
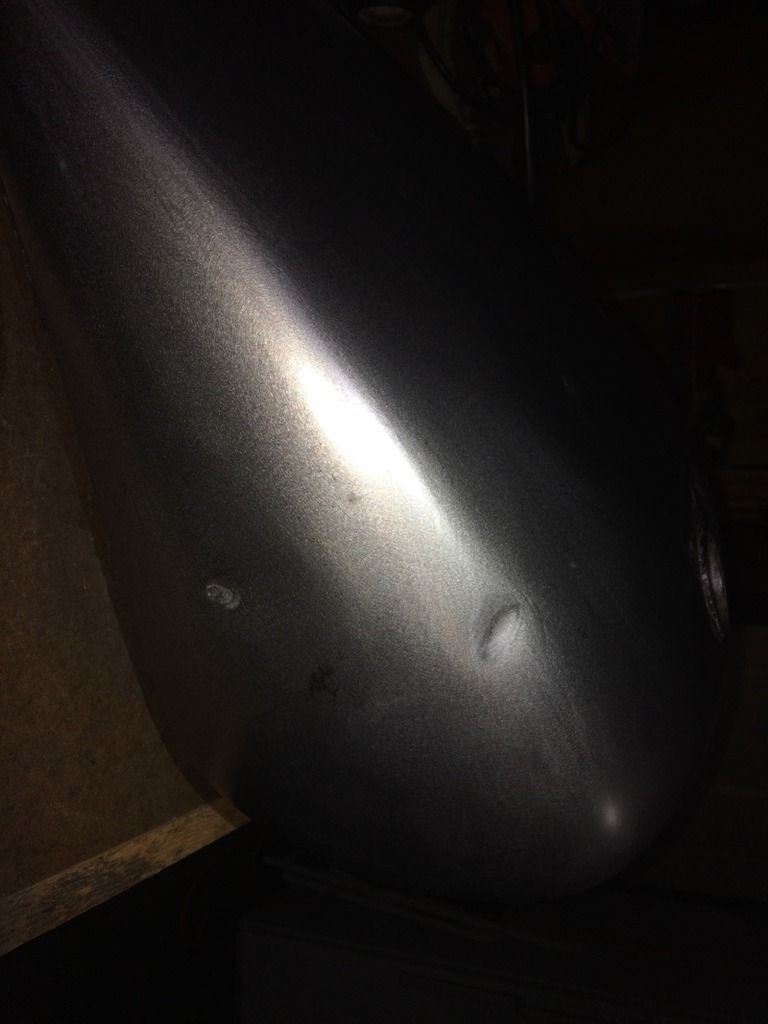
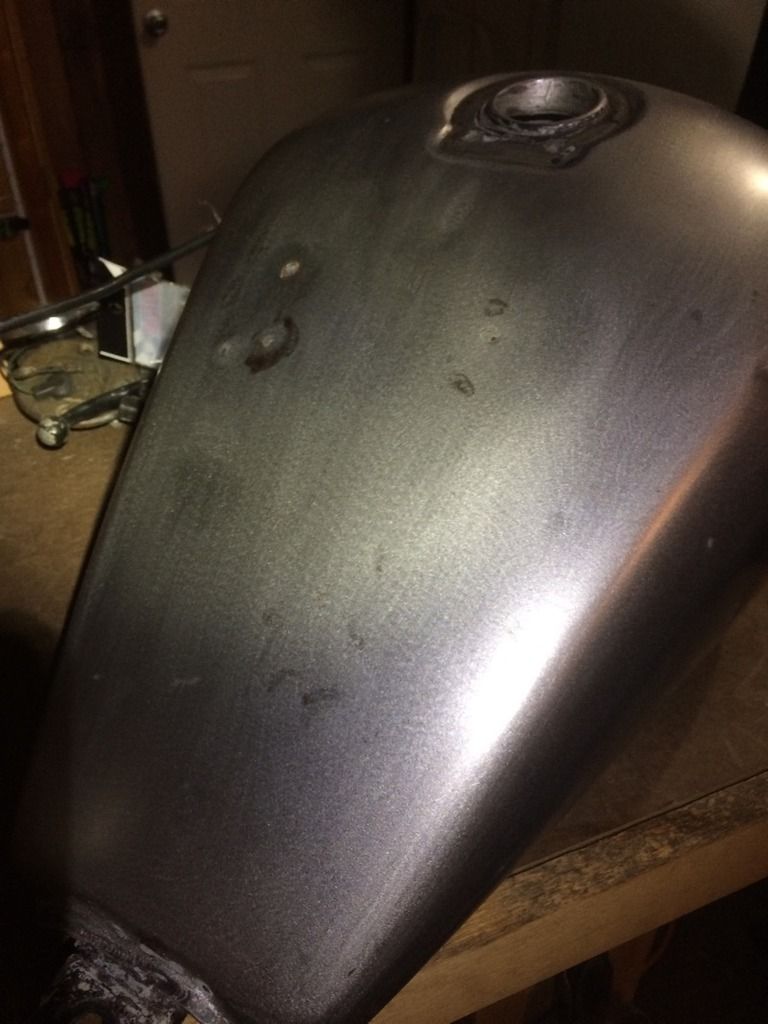
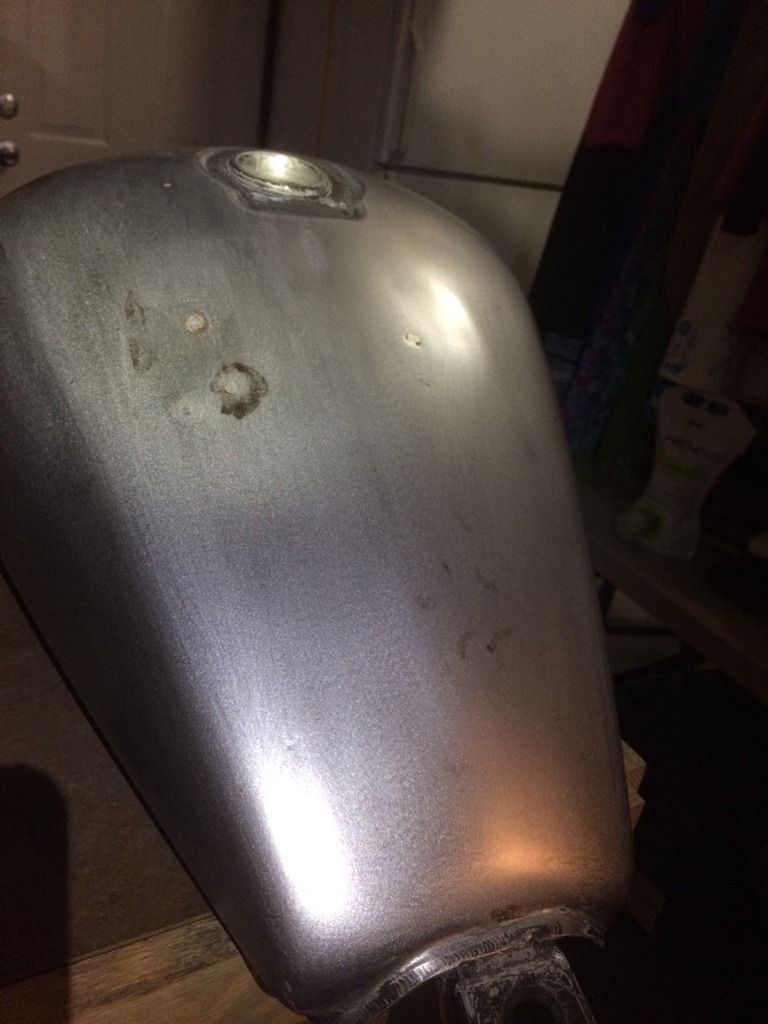
Starts up and sounds like a 454 should!!!!!! Congrats, good job!!! Oh, with some Mother's polish, and a lotta elbow grease, that engine will shine like a mirror!!!!!! I'll admit being surprised by the sound, a little more stout than I expected. I'm so excited! So today I started stripping the paint from this abomination. 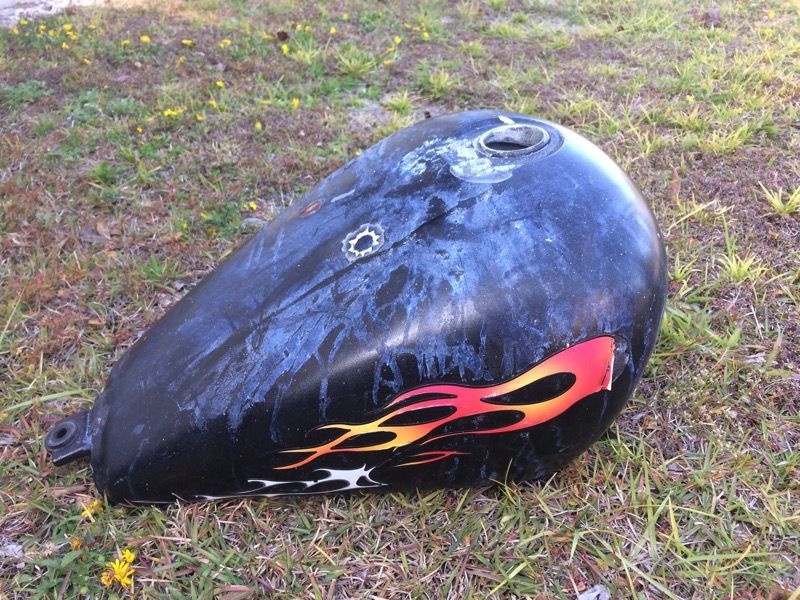 Looks like the original color was a nice shade of baby blue. Found plenty of bondo. That shiny spot in the middle is a bullet hole sticker that is showing incredible resilience. 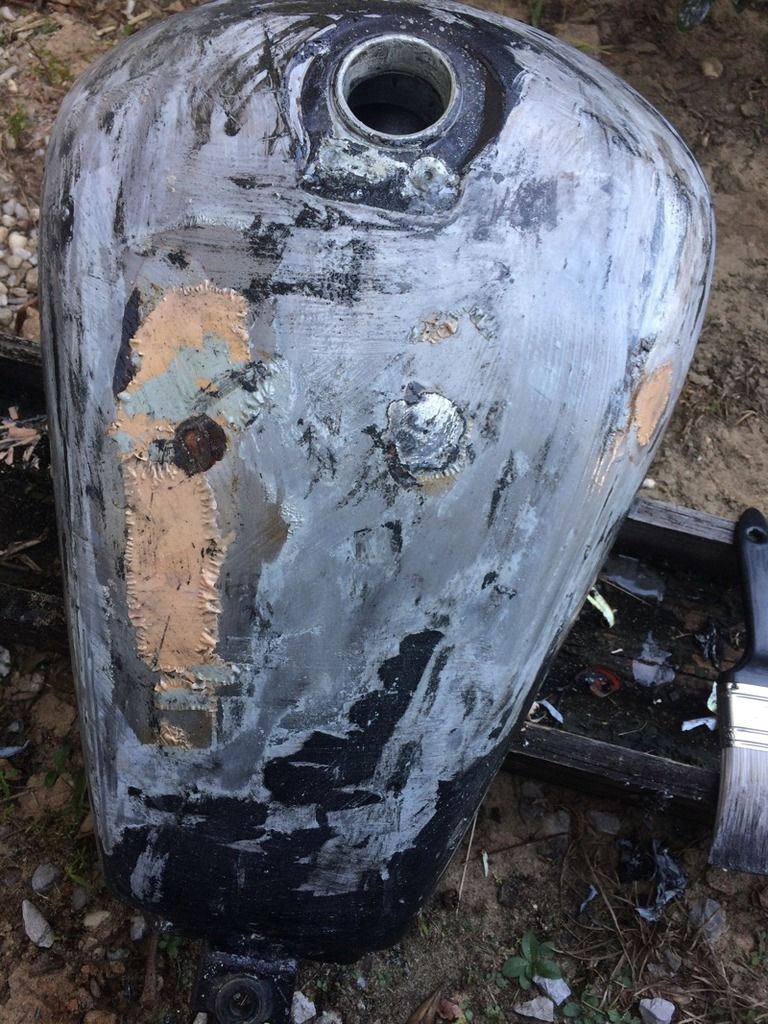 Pretty significant patch job on the side. 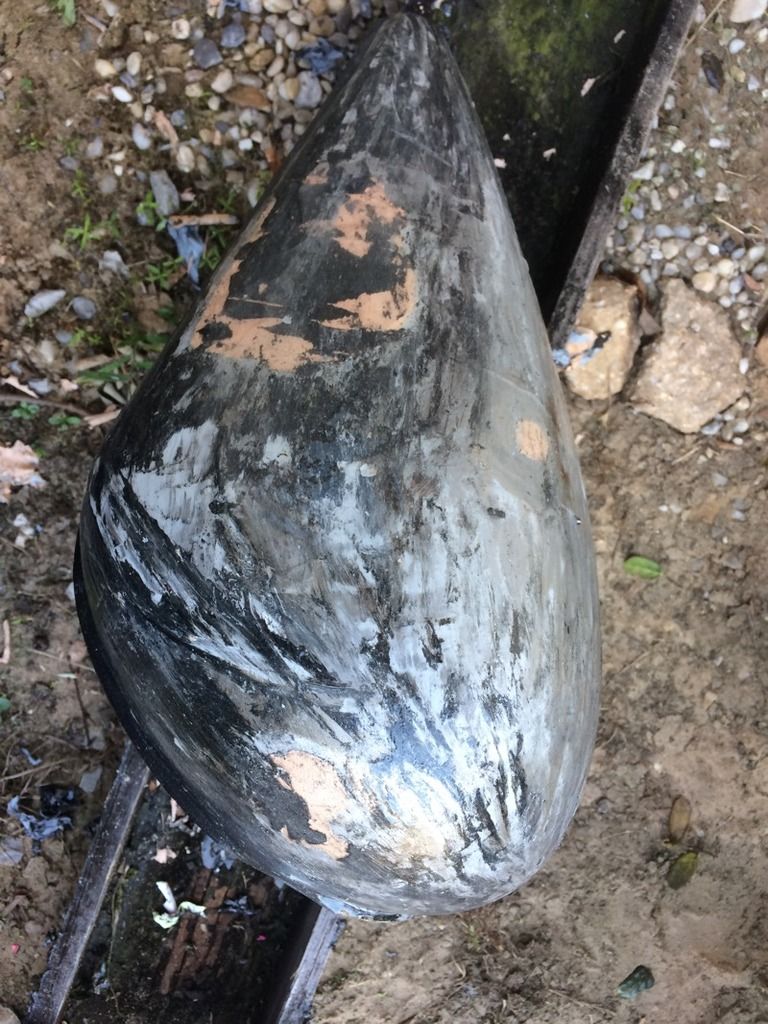 Right in the center appears to be some sort of metal patch, with rust starting around it. I was hoping I wouldn't find any patched holes but this one doesn't seem to be too bad. I knew that the rust spot to the bottom was there but the place on the left was growing under the paint, so as much as I don't want to be doing this I'm glad I'm stripping it down. Still haven't dug out the rest of the filler on the side though. 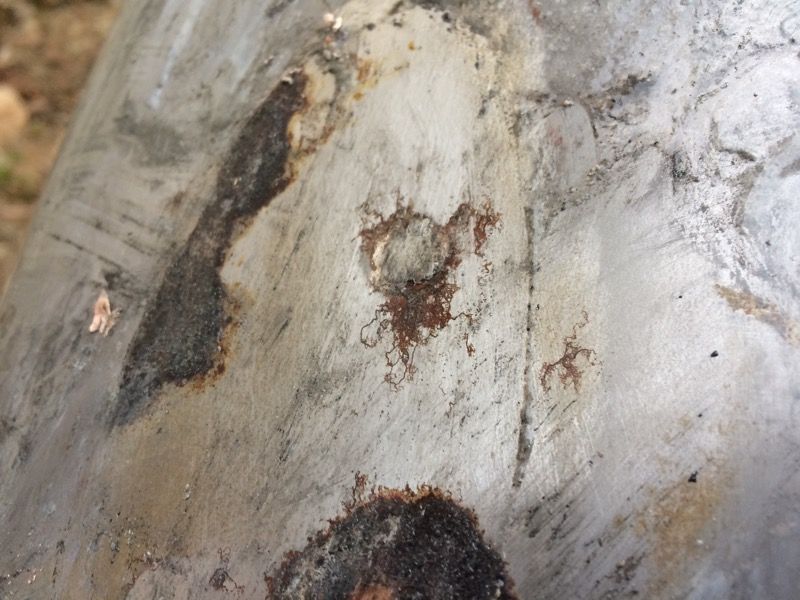 |
|
|
|
Post by dadbike on Nov 29, 2016 16:13:33 GMT -6
|
|
|
|
Post by dadbike on Nov 30, 2016 9:30:15 GMT -6
|
|
|
|
Post by dadbike on Dec 3, 2016 15:26:02 GMT -6
|
|
|
|
Post by eaglerider on Dec 4, 2016 6:03:28 GMT -6
Hint: You will need to put a small filter on the crankcase vent....that sliver colored round cap under and behind the carbs. You can get those at most any auto supply store.
|
|
|
|
Post by forjstone on Dec 5, 2016 15:53:00 GMT -6
When you go to re wrap your wiring harness check out expandable sleeve no fray poly wiring loom. I used 1-1/4" diameter for the main wires and 3/8" diameter for the smaller sections coming off the the reg rec, controls, radiator stuff...
|
|
|
|
Post by dadbike on Dec 5, 2016 21:01:49 GMT -6
eagleride, thanks for the tip. The plan is to run a tube up and T it into the ends of the pod filters as I've read that it can help keep the slides lubed a little. Will probably pick up one of those filters until then though.
forjstone, thanks to you as well, I'll look into it. I've got vinyl loom wrap ready to go but that sleeve would finish it off really well.
|
|
|
|
Post by eaglerider on Dec 7, 2016 7:30:00 GMT -6
There is a pic on the "Eagle" thread here in the photo gallery of my gauges.
|
|
|
|
Post by dadbike on Dec 14, 2016 22:01:13 GMT -6
|
|
|
|
Post by dadbike on Dec 16, 2016 16:00:01 GMT -6
No sissys allowed. Just a quick hack job and I'll have to spend time filing/sanding/painting the rails but this gives an idea of where it's heading.   |
|
|
|
Post by dadbike on Dec 17, 2016 10:33:54 GMT -6
|
|
|
|
Post by dadbike on Dec 22, 2016 12:57:36 GMT -6
Progress! And setback!!! Got it mostly back together. Going with stock fork clamps and gauges for now just to get it on the road. Gauge bulbs will be in tomorrow then they can go back together along with the headlight. Got my under-seat electronics placed, wiring harness wrapped, and everything electrical seems to be working. Brakes are bled and grabbing, axles torqued properly. Rolled it out and it fired right up. Got a slight coolant leak from the thermostat housing but I think I've got a new o-ring already so that shouldn't be a big deal. Engaged the clutch, put it into gear, and it died. And that's the setback. I've adjusted the clutch according to the manual but have never really liked the way it felt (sitting still mind you, remember this was given to me as a non-running project). Pulling the handle does not feel smooth and it doesn't act like it wants to rebound properly. I tried letting it warm up for a while (confirmed the temperature gauge and radiator fan work) and also tried rolling it down my driveway while running then kicking it into gear. It just dies. Any thoughts?  |
|
|
|
Post by dadbike on Dec 22, 2016 22:13:58 GMT -6
Took apart the clutch discs. Several were stuck so I wiped all of them down but am still getting the same result. The clutch will not slip. So I suppose I'm back to cable adjustment. I bought a new cable and am wondering what perhaps it's not the right one for this bike.
|
|
|
|
Post by dadbike on Dec 23, 2016 15:27:30 GMT -6
Took it apart again, nothing was obviously out of place. The pressure plate springs were short so I added washers to take up the necessary distance but it did nothing. Strange that I can roll it down the hill in gear with the clutch pulled but it just dies immediately when I try shifting while it's running, almost like it's a sensor issue but the neutral switch does work so I'm just at a loss. I'll get new springs but for now I don't have time to dig any further. But at least it looks like it runs.  |
|
|
|
Post by dadbike on Dec 23, 2016 22:31:52 GMT -6
IT WORKS! Faulty kickstand safety switch! Quick bypass (how convenient that the wires already have male and female ends?) and it went into gear just as smooth as anything I've ever seen. Too late right now but I will get up at sunrise to take it for a first ride.
|
|
|
|
Post by dadbike on Jan 19, 2017 16:13:48 GMT -6
I've had such a great time riding this bike, and now have it out of commission once again for some upgrades. Installed the Vulcan 500 fork clamp. I tried out a set of cheap clip-on handlebars but while it felt good from the waist up, waist down wasn't as comfortable, so I went back to the Emgo steel bars I installed previously. New smaller gauges from Dime City Cycle. I've got the wiring sorted out and when the led diodes arrive tomorrow I'll cut off the pigtail from the old gauge cluster and solder it together so that I have a way to disconnect the wiring should I ever need to. I also found a place to mount the stock ignition switch and will need to unwrap the wiring harness a bit to be able to move it down below the coolant reservoir. Also got a brake master cylinder from a 2004 Kawasaki ZG1000 Concours because the reservoir sits level with these bars, as opposed to angled like the stock one would. That unit also has the 10mm mirror mount and it extends over the stock control to the hand grip like the original 454 brake did. I ordered one from an older Ninja that had the right angle for the reservoir but I didn't pay attention and missed that it didn't have the mirror mount and also couldn't go right beside the ignition control like stock. This ZG1000 unit is perfect. New grips also installed but that's probably going to end up being a waste because I managed to break the little ring on the throttle tube where the throttle cable attaches. I'm not finding any throttle tubes that look like a sure fit so I'm probably going to just get a matching aftermarket set of grips with the throttle tube built in. Oh and I also got the wiring sorted for my new led headlight. I went ahead and bypassed the Reserve Lighting Device because sometimes a led headlight can be troublesome for that box. So I think the final version of this bike is just about ready to get back on the road.      |
|
|
|
Post by dadbike on Jan 23, 2017 17:00:34 GMT -6
I moved the ignition switch using a gauge mount from Dime City Cycles. I originally intended to use the mount for, you know, gauges. Then I got the idea to put them where I did and when I was looking for a way to mount the switch I realized I made a pretty fortunate mistake.   |
|
|
|
Post by dadbike on Jan 26, 2017 16:23:40 GMT -6
|
|
|
|
Post by forjstone on Jan 26, 2017 21:15:11 GMT -6
New gauges look great. Amazing what a difference the ninja top tree makes |
|
|
|
Post by dadbike on Feb 11, 2017 22:08:10 GMT -6
|
|
|
|
Post by dadbike on Feb 11, 2017 22:09:14 GMT -6
|
|
|
|
Post by dadbike on Feb 11, 2017 22:09:32 GMT -6
|
|
|
|
Post by forjstone on Sept 28, 2017 17:42:32 GMT -6
I moved the ignition switch using a gauge mount from Dime City Cycles. I originally intended to use the mount for, you know, gauges. Then I got the idea to put them where I did and when I was looking for a way to mount the switch I realized I made a pretty fortunate mistake. Looking good! |
|


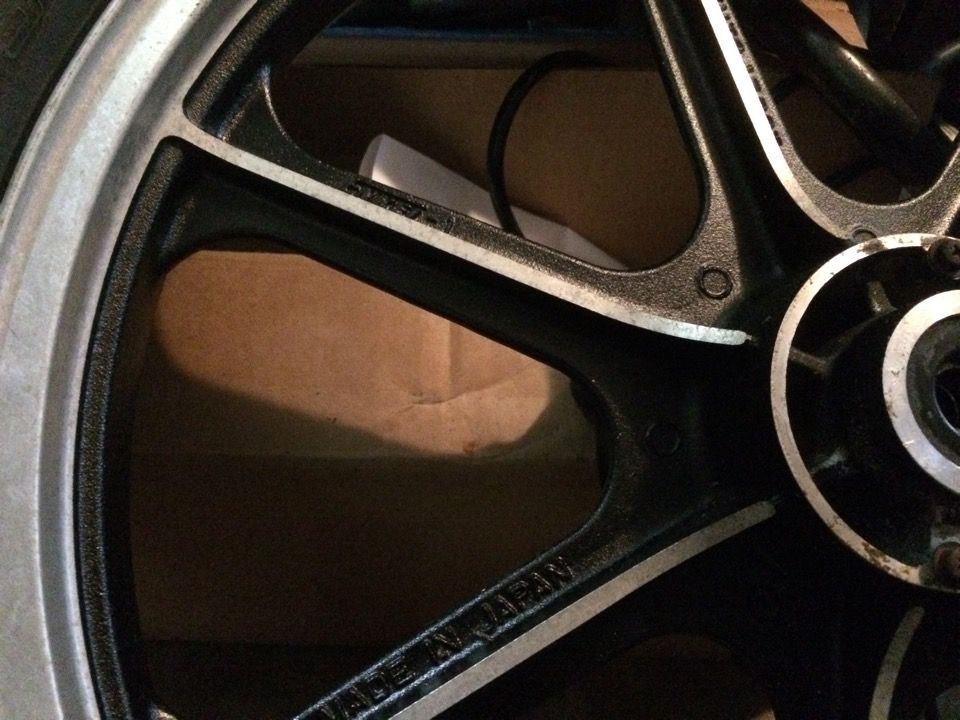
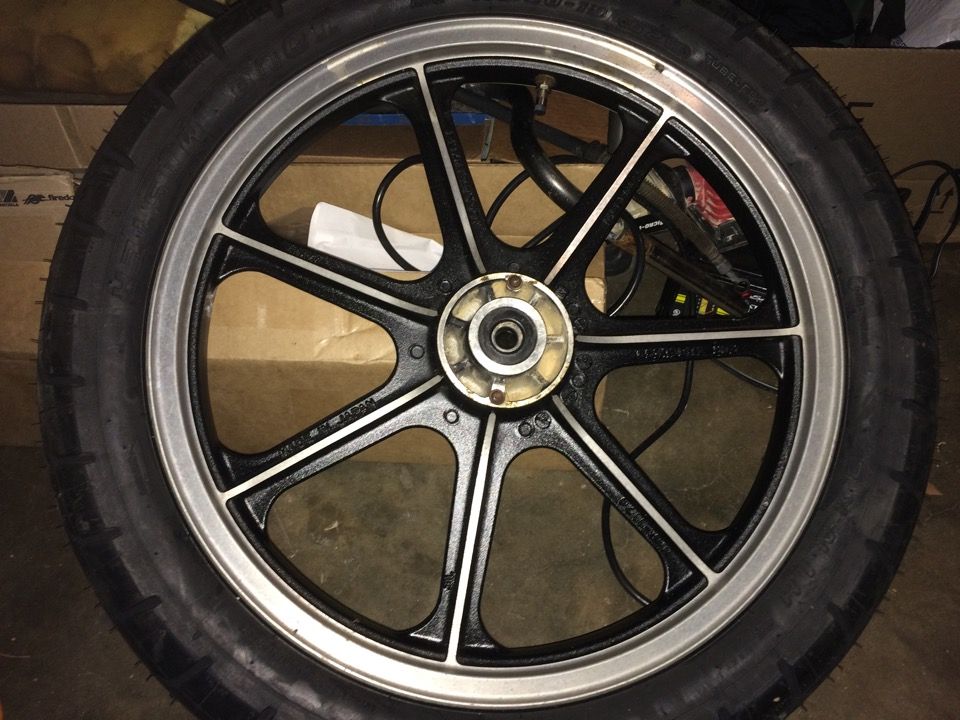
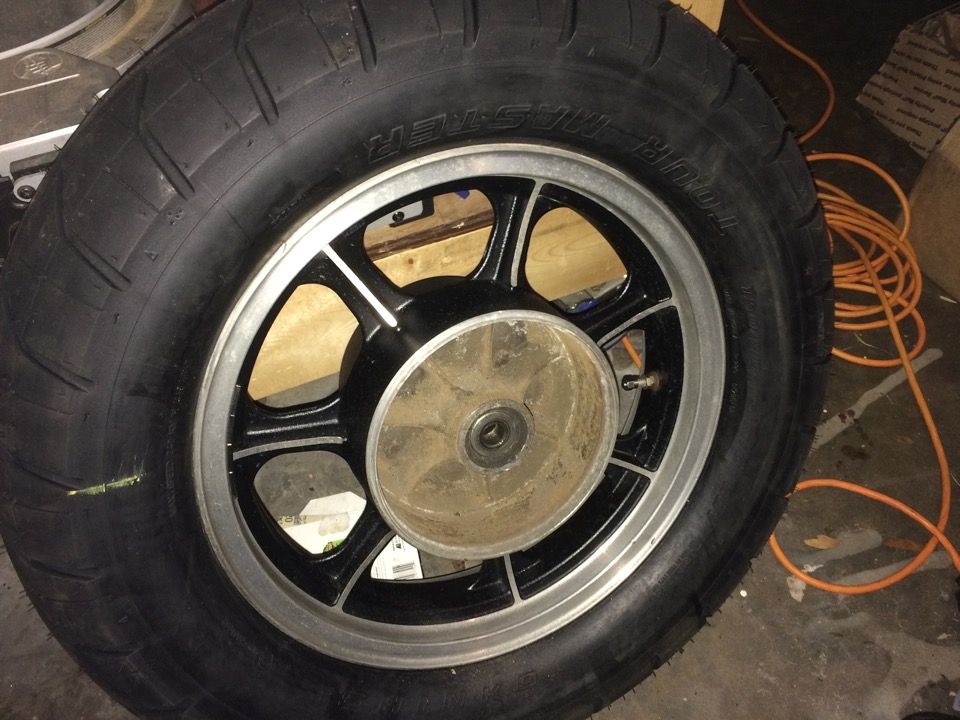
 Got up early this morning to remove the front brake caliper, got the line cleared out, brake disc bolts and front axle nut broken loose, and the brake master soaking in solvent to try to get the plunger free. Tomorrow morning I'll remove both wheels because tires should be in this week. Progress...