|
|
Post by Moriarte on Apr 23, 2012 12:21:13 GMT -6
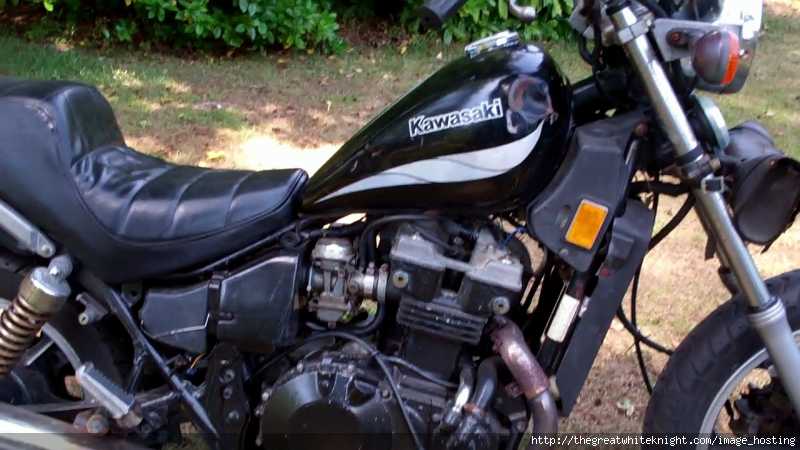
So I noticed last Wednesday that my radiator fan isn't coming on at all, causing my bike to dangerously heat up when I come to a stoplight, etc.
I parked her over the weekend and we have had too much rain for me to really get out there and take a look. But I wanted to ask a ? here before I do.
Is there a way to run power directly to the fan to see if it is a burnt fan motor, without taking the fan completely off the bike? I'm really not looking forward to dissasembling the entire radiator/hoses/etc. to pull it off of there if I don't have to.
-Mori
|
|
|
|
Post by eaglerider on Apr 23, 2012 12:27:10 GMT -6
Sure, there are posts that address that....just run a hot wire from 12 volts to the fan wire from the thermoswitch on the bottom of the radiator (unplug the themoswitch first)...if the fan comes on, the fan is good. Perhaps the ground is not making good contact? Or perhasps the connection from the thermoswitch has gotten cruddy?
|
|
|
|
Post by Moriarte on May 1, 2012 11:21:59 GMT -6
How often do these fans go bad? I managed to get out there yesterday and check the wire from the bottom of the radiator that goes up to the fan. The connection was real fragile and actually broke off in my fingers.
I then took a positive wire from the battery directly to that wire (since it was now disconnected) and the fan didn't even thrum like it wanted to work. I also noticed moisture on the outside bottom of the coolant reservoir sitting right next to the fan itself (I wonder if maybe the reservoir has a small leak and leaked into the fan and burnt it out?).
Where can I find a cheap replacement for the fan if it is indeed bad?
-Mori
|
|
jp
Junior Member

Posts: 188
|
Post by jp on May 1, 2012 14:40:01 GMT -6
Grounding the wire from the thermoswitch should run the fan, not 12 volts. Unplug the fan wires from the coupling behind water resorvoir, run 12 volts to one of the wires, ground the other. Fan should run with that thermoswitch wire grounded, I do believe.
|
|
|
|
Post by wanchesenative on May 1, 2012 21:06:33 GMT -6
The wire coming from the sensor is the ground wire and not the positive wire. if you touch that wire to a good ground, the fan should come on, Assuming the key is on.
|
|
|
|
Post by Moriarte on May 7, 2012 16:44:48 GMT -6
Ok, finally got out there today after work to test it again. With the fan switch wire unhooked from the radiator and run to a ground on the frame, a positive line and negative line from the battery running straight to the posts on the plug to the fan itself, and the key on, I get no movement from the fan.
This blows. My time to ride is being impacted and I don't have a lot of free time on weekends or at night to do any work on he. Ugh...
Anybody have a used one that works and they are willing to part with?
-Mori
|
|
|
|
Post by Jet⚡Black on May 7, 2012 17:06:40 GMT -6
Did it hum or make any noise like a buzzing or low hum? Even a bad fan should make some noise with current running through it. With current applied you can give it a quick spin by hand to see if it tries.(be careful doing so)
If it did make a noise when you hooked it up, it should be able to be rebuilt. If it didn't hum then the wiring might be shot, it's still a good idea to try cleaning it up then try it again. I'll go out and get my fan and see if it can fixed to run with out rebuilding with new parts...Electric motors are pretty simple to work on if they come apart.
I'll be back in a few if it does come apart I'll walk ya through it.
|
|
|
|
Post by Jet⚡Black on May 7, 2012 18:53:29 GMT -6
The good news is they do come apart and can be cleaned and rebuilt. Tools: 10mm, 8mm, phillips head, 2 jumper wires, 12v battery, and one of the following (3m pad, steel wool, fine grit sand paper) Make sure to have a cup or dish for all removed bolts screws etc. work on a large light colored surface to not lose anything. Here are the jumper leads, strip the two wires for jumpers thread them through holes in socket post. Right side in picture is the post on the socket clip side is Negative to battery. Attach jumper two make sure they are firmly on the posts or they will not spin the fan. 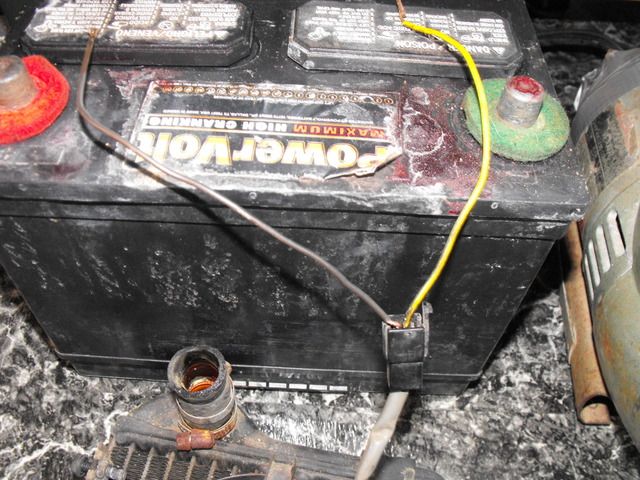 If the fan will not run from jumpers, use a 10mm wrench on the following 3 bolts. 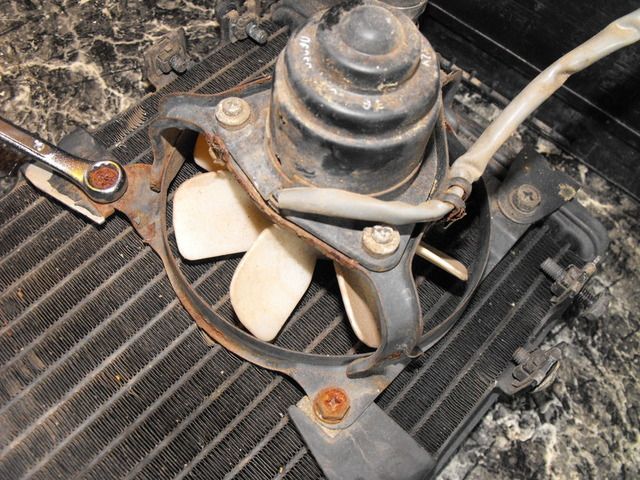 next use an 8mm wrench on the fan nut, use the enclosed box end of the wrench so it doesnt strip the bolt. Try to grip as much of the fan as possible to not bend or break the blades. 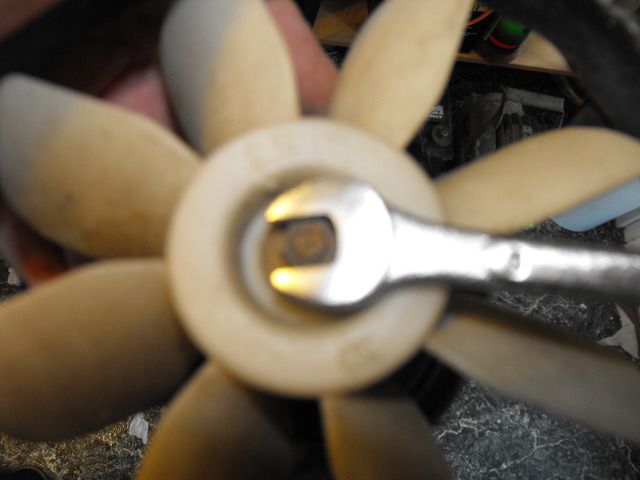 Next remove these 3 screws with phillips  Next remove the rubber dust cover 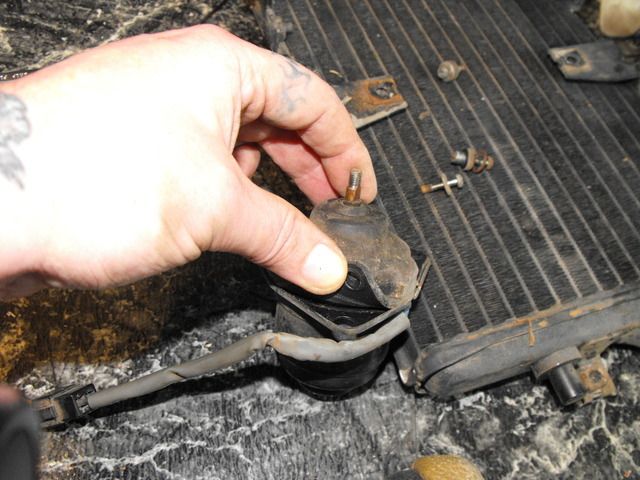 Next remove these two screws with phillips 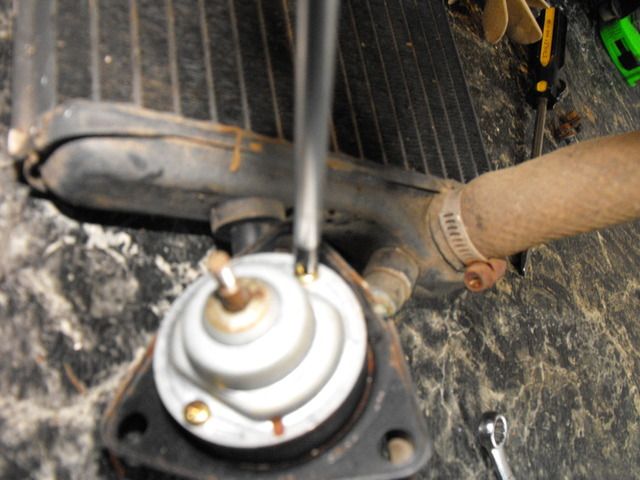 Gently remove motor from housing, making sure the socket plug wire is free from grabbing the housing 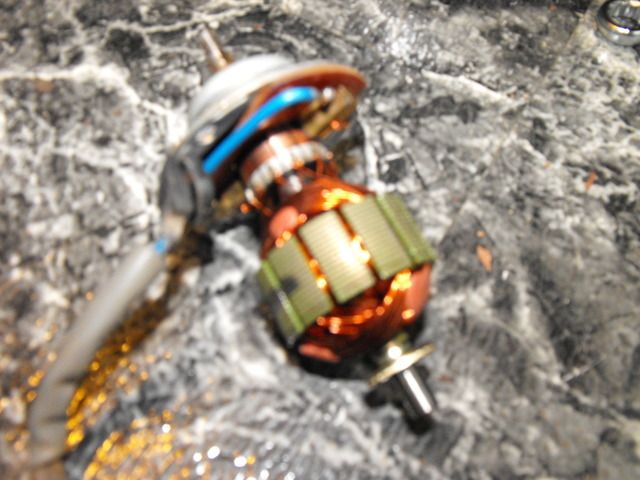 Remove motor from base slowly with a slight twisting motion, the brushes are spring loaded and we don't want to lose the springs...hence the light work surface. If you do lose a spring and can't find it. Find a clicker style ball point pen and raid the spring out of it, and cut it to the same length as the other spring. Brushes clearly shown(small black magnet colored pieces attached with a copper wire) Make sure to clean out under the phenelic board where the rotor shaft end sits. 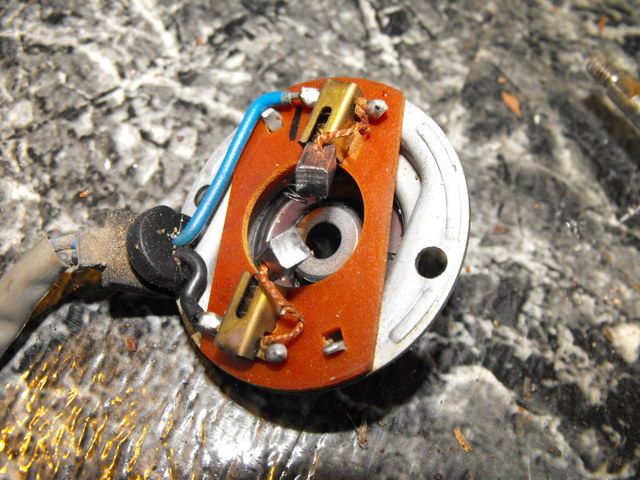 Next clean the surfaces of the rotor part of the motor pictured shafts and copper part, not the green part unless it needs it, with one of the following (3m pad, steel wool, fine grit sand paper) 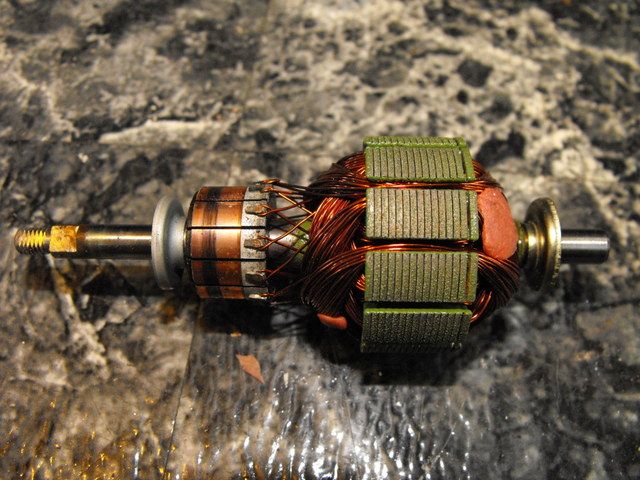 Make sure not to lose the washer in the bottom of the housing pictured below. You will want to place that washer on the shaft first to make assembly easier. 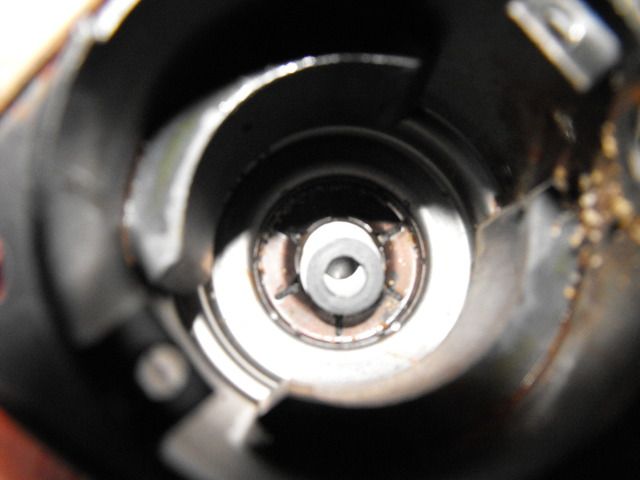 Reverse the steps to re assemble.... Place the spring behind the brushes, reinsert rotor shaft in, place washer on end of rotor, holding rotor shaft brush end down place housing on the top, gently get things back in place and aligned, place silver cap that had 2 screws back on and tighten, replace dust cover, attach jumpers and test, if all is well it will spin, attach motor back to blade housing with 3 screws, place fan back on the shaft lining up the slots and tighten with 8mm, attach fan back to radiator with the three 10mm bolts, enjoy your working fan. The fan flaw is the housing has two holes for the motor to release heat, bugs and crap can crawl and fly into these holes gumming it up. If for some reason you run into trouble let me know what the issue is. Starter motors can be cleaned exactly the same way, all bushed electric motors have roughly the exact design like this....circular saws, drills etc, usually they just need cleaning and the brushes flipped. |
|
|
|
Post by Blaine on May 7, 2012 20:40:01 GMT -6
Awesome write-up & pics.Thanks for taking the time to put this together.Much appreciated!!   |
|
|
|
Post by Jet⚡Black on May 8, 2012 9:59:43 GMT -6
I hadn't tested my fan, it worked in the intial test. But I found some dead bugs up under the electrical board, and cleaned the contacts in the process.
It's something I needed to do anyways, and since Moriarte was having trouble; it seemed as a good time to go through it. So I hope it helps he and anyone else looking to bring theirs back to life.
I forgot to mention a little grease at the end of the shaft in the housing and some on the fan shaft will make it run super smooth...and that there's a particular place reserved in heck, for the brush designer...trying to hold two brushes in and get the shaft back in at the same time can be tricky.
|
|
|
|
Post by Moriarte on May 8, 2012 14:56:17 GMT -6
Awesome write up, and thanks so much for the pics. I will try to get the fan off the bike tonight, but won't be able to start the disassemble/rebuild until after work Thursday. I'll definitely let you know how it goes.
Again, thanks a ton,
-Mori
|
|
|
|
Post by Jet⚡Black on May 8, 2012 15:25:12 GMT -6
No worries man, I got to check out my fan in the process I thought if it came apart; it wouldn't take too long to throw something up for ya...I figured a fix in a day or so; would be much better than cash and a week or so of shipping and waiting to ride for you. I'm a big proponent if it can be repaired, rebuilt, or made to work do it ;D |
|
|
|
Post by Moriarte on May 21, 2012 11:55:07 GMT -6
As an Update, this worked really well. I was able to tear it down, clean it, and put it back together. It works now, although I am hooking it up to a toggle switch. I am pretty sure the fan switch in the radiator is bad.
But now I am frustrated beyond belief. I finally get it all assembled, and my battery charged up to full, and now she won't turn over. I have it in neutral, the kill switch is set to "Run", I push the starter button and I hear a very faint "click" from the area near the battery, but that is all. No fire, it won't start. Ugh!
I'm working on this between work/church/family issues/preparing for my son's graduation and the piece meal of it all is driving me batty.
What is a sign that I have a bad igniter (not sure if the faint sound is from the battery or the igniter on top of the battery)?
-Mori
|
|
|
|
Post by Jet⚡Black on May 21, 2012 13:17:40 GMT -6
Nice to hear the fan got sorted; sounds like the dreaded if it's not one thing it's another...I think first it would be good to recheck all the wiring from what you were working on to make sure nothing got left out, plugged in the wrong place, or is shorting out. The clicking is a good sign, that means the electronics are doing their job or trying too...so I doubt the igniter is bad. If all of that looks good, you can get something known as hydraulic lock in as little as 5 days of sitting(cylinders full of non compressible liquid), especially with this type of petcock that won't turn off. Pull both plugs and try to turn it over if it spurts out fuel when it cranks over that's what it was. If the battery won't turn it over with the plugs out use jumper cables on it...there might not be enough cranking amps to break the hydro lock. Re-install plugs and you should be good to go then. If still nothing...what you learned from rebuilding the fan is going to come in handy; time to take apart the starter and clean it. Don't worry this is easier than the fan believe it or not. The steps are remove the side cover, un-bolt the starter, the sprocket thankfully just slides out, disassemble and clean, place some grease on the shaft and reassemble. I put those in order of easiest and most likely, if for some reason none of the above gets it going let us know and we can go from there. If it does fix it let us know...I always have a nagging wonder of whats going on |
|
|
|
Post by eaglerider on May 21, 2012 17:24:52 GMT -6
Before tearing into the starter, check all connections, grounds, starter selonoid, etc. Sounds more like there is not enough juice to spin the starter, for some reason. Jump the starter selonoid to see if the starter spins.
|
|
|
|
Post by wanchesenative on May 21, 2012 18:03:59 GMT -6
I had a similar problem a while back with my starter. Without warning, it just stopped working. I got the solenoid click so I knew it wasn't the electrical but even jumping the solenoid would not turn it over. I got another starter from a member and she worked like a charm. A few days ago, I had the same problem with this starter. Since I was now in a "situation," I took apart the 1st starter to find out what happened to that one. There was nothing left of the brushes but dust. (and I mean NOTHING) I pulled the 2nd starter and pulled it apart. This one had a SMALL amount of brushes left on 3 of the 4, but the 4th was toast and the ones that were left didn't have enough left to put back in place after pulling it all apart. If this ends up being your problem, I just bought a rebuild kit off ebay for $21 shippped. I'll let you know how it works when I get it.
|
|
|
|
Post by wanchesenative on May 23, 2012 20:26:11 GMT -6
|
|